$20 Hopback - by Orion
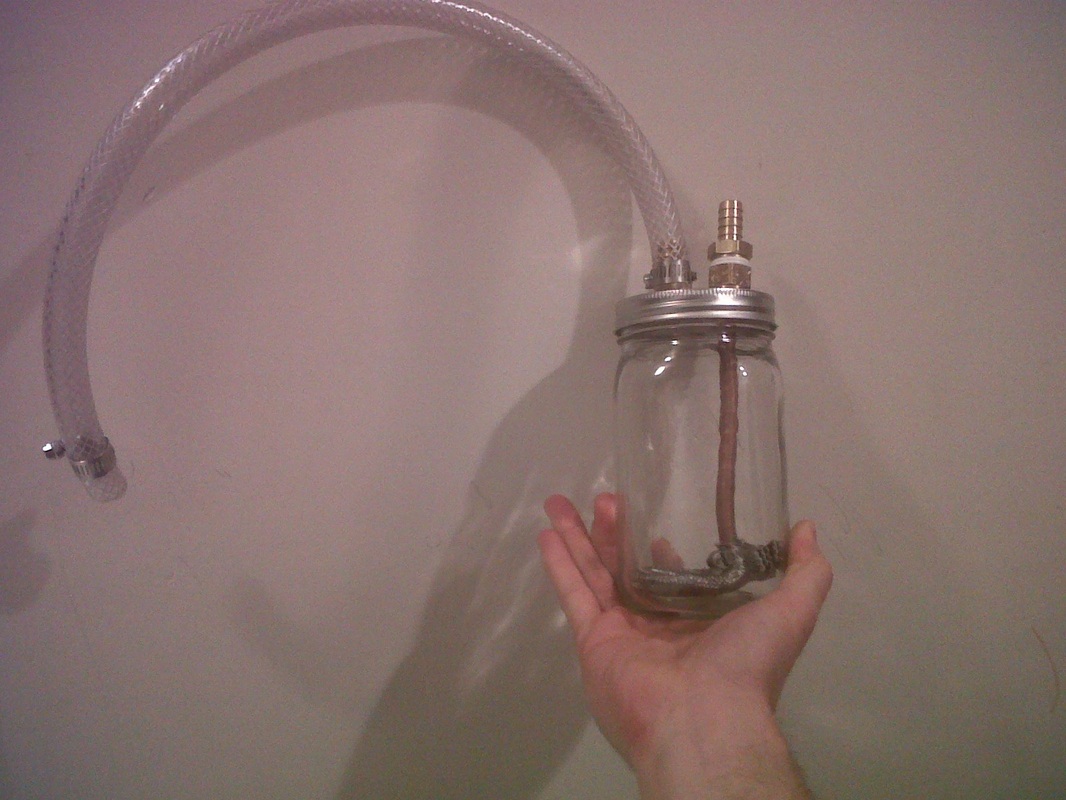
A hopback is a device that is airtight in which hops are soaked with very hot wort from a brew kettle post boil. This extracts flavor and aroma compounds and prevents them from leaving the wort since it is in a closed airtight system. At the output end of this system is a cooling feature used to reduce the temperature and thereby lessen the escape of the volatile oils from the hops and keep them in the wort.
After much research as to how to create a hopback, I have decided to go with the quart mason jar option instead of using a stainless steel canister from a large store such as "Bed Bath and Beyond". The reason behind this is simple, I have little money to spend on brewing stuff, so a mason jar which was $1.99 beat out a $21.99 set of four stainless steel canisters. I also like the fact that you can look inside it as the hops steep, I dunno, the 7 year old mad scientist in me likes watching his projects unfold...
After much research as to how to create a hopback, I have decided to go with the quart mason jar option instead of using a stainless steel canister from a large store such as "Bed Bath and Beyond". The reason behind this is simple, I have little money to spend on brewing stuff, so a mason jar which was $1.99 beat out a $21.99 set of four stainless steel canisters. I also like the fact that you can look inside it as the hops steep, I dunno, the 7 year old mad scientist in me likes watching his projects unfold...
Materials Required
- Quart size Mason jar with lid and lid fastener.
- 1/2' inner diameter tubing rated for high temperatures.
- 2 brass male barbed fittings. The barbed end is 1/2' outer diameter. The threaded end is 3/4' outer diameter.
- Brass 1/2' to 3/8' reducing coupler.
- 3/8' internal diameter rubber washer.
- Brass 3/8' compression fitting with crush bolt.
- 6.5' length 3/8' outer diameter copper tubing.
- Stainless steel braided hose.
- 2 small stainless steel metal circle clamps(large enough to fit around 3/8' copper tubing).
- 2 medium stainless steel metal circle clamps(large enough to fit around 1/2' plastic tubing).
- 5/8' internal diameter metal washer(any metal can be used, as this will not come in contact with the hot wort).
- 2 Rubber washers, one with 3/8' internal diameter, other with 5/8' internal diameter.
- Food safe Teflon tape(Plumbers tape).
- Flat head screwdriver.
- 3/8' to 3/4' step bit.

The above image shows the hardware used to connect the fluid input and output without letting air in or out. On the left is a 1/2' barbed male fitting which is screwed into a 1/2' to 3/8' female reduction coupling. Between the coupling and the lid is a small rubber washer. On the right is another 1/2' barbed male fitting that is literally screwed into the jar lid itself. Between this and the lid is a simple washer with a 5/8' internal diameter opening. Beneath the washer is a rubber washer. Where tubing connects to metal is a small metal circle clamp tightened down by a screwdriver to keep the entire system airtight, as without them air bubbles in from the gaps between the barbed fittings and the tubing. All holes were drilled using a step bit and not removing small burrs and imperfections from the underside of the lid. As long as you wrap each fitting going through the lid with 6-10 swipes of the Teflon tape it will be airtight.
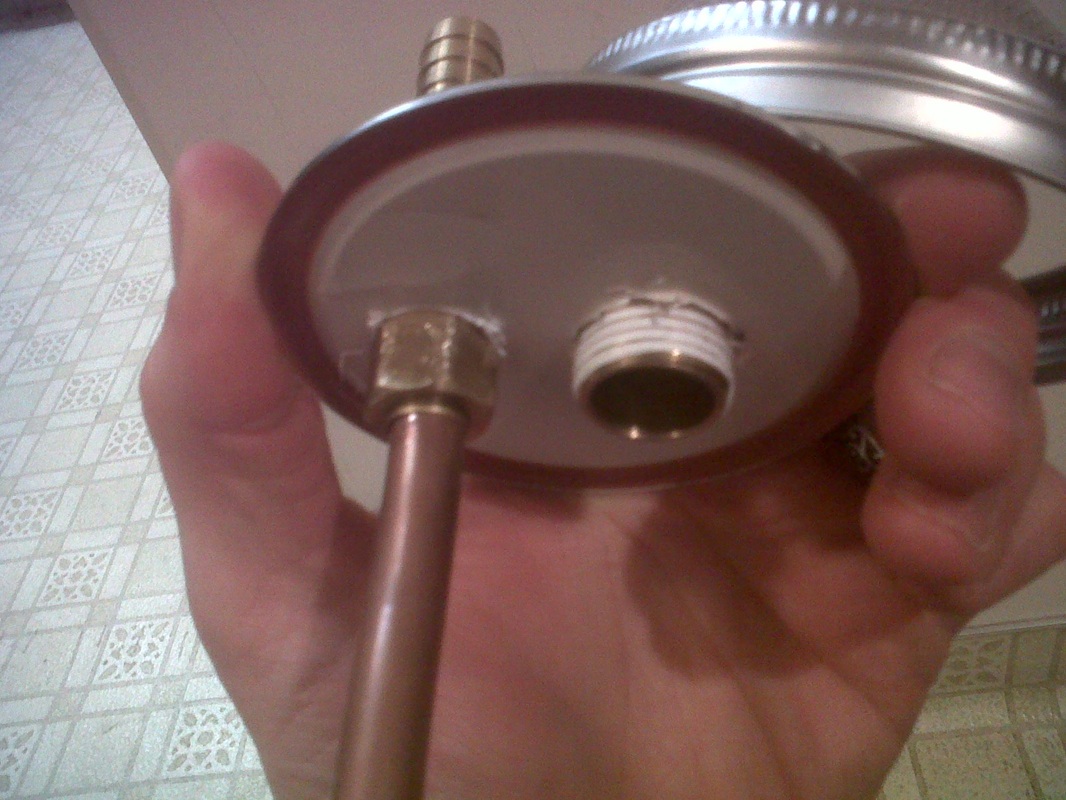
In the picture above on the left is the input tube of about 6.5' in length and 3/8' outer diameter. This connects to a compression fitting that screws into the bottom male threading of the reducing coupler. On the right is just the bottom of the 1/2' barbed fitting that screws directly into the jar lid.
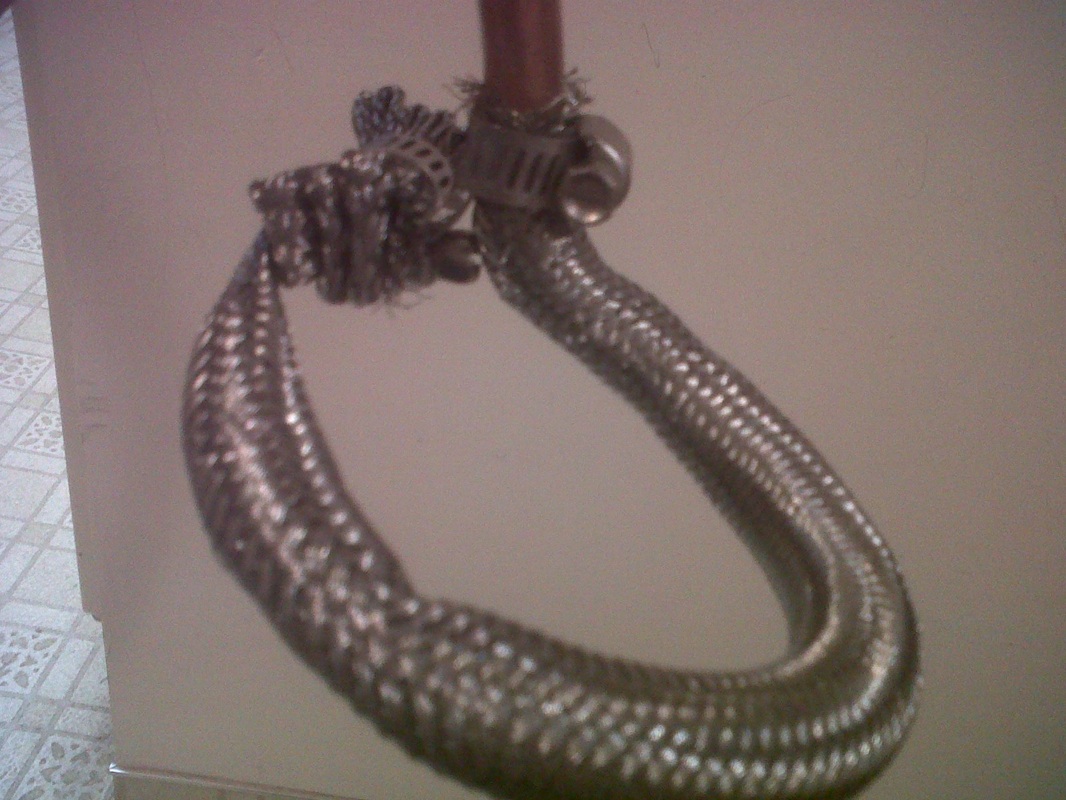
In the above picture you can see that a braided stainless steel housing typically used for toilets and other plumbing aplications has been attached to the bottom of the copper tube. It is connected with a small metal circle clamp. This clamp also latches onto the excess material from the circle clamp at the end of the braid, this ensures that the braid retained its shape as a circle to rest at the bottom of the jar.
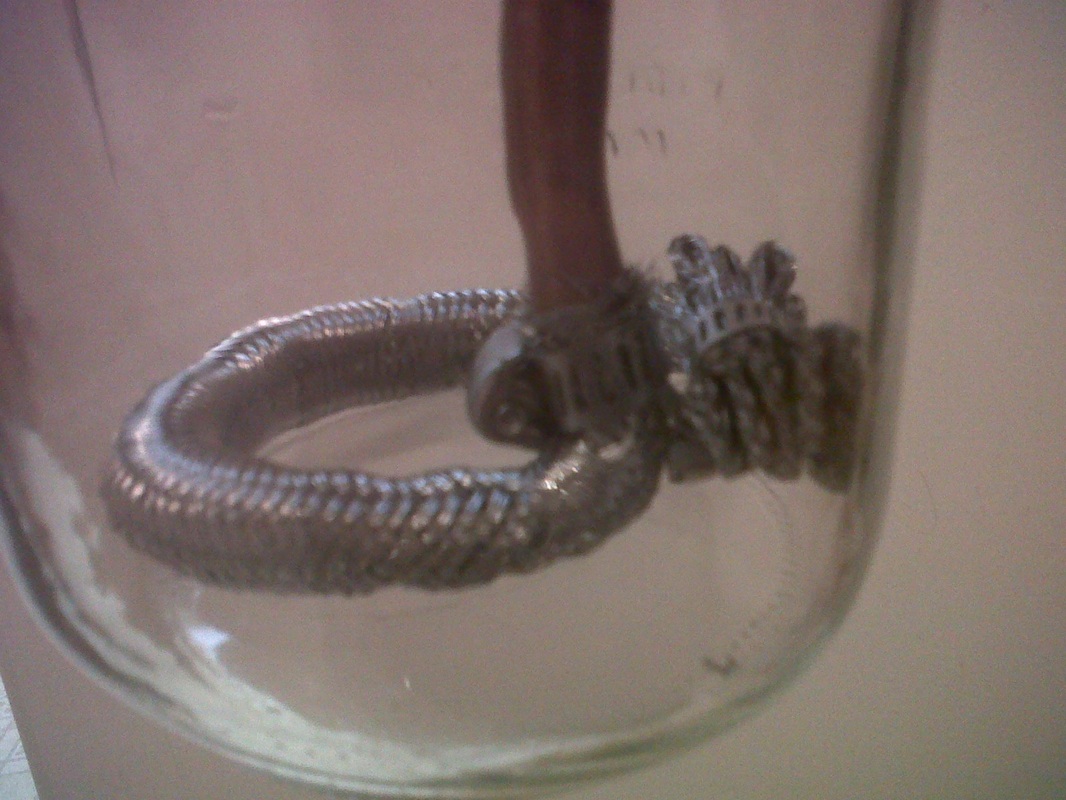
In the picture above you can see the braid resting at the bottom of the jar. The length of the braid was too long so I folded it over several times on itself and crimped it shut with a metal circle clamp. I have used these braids before in my mash tun and they will not clog. They are great for filtering solids from liquids and will keep the hops, hot break proteins and cold break proteins in the jar while letting wort flow out to be cooled.
I have yet to test it out for real with anything other than water, but I am planning on making Denny Conn's Rye IPA this weekend and will note how well it works.
Using your new hopback
Tips:
Procedure:
I have yet to test it out for real with anything other than water, but I am planning on making Denny Conn's Rye IPA this weekend and will note how well it works.
Using your new hopback
Tips:
- Typically 1-2 ounces of hops are used in a hopack per 5 gallons of wort.
- Only leaf, cone or whole hops may be used, pellet hops will clog your hopback!
- According to an interview in Brew Your Own magazine all aroma and flavor compounds are extracted after 20 minutes, after 20 minutes, nothing else is extracted.
Procedure:
- Place hops in the jar.
- Seal the lid tightly.
- Slowly add hot wort from the boil kettle, making sure that air in the jar can escape through the outlet tube or fitting. Once the jar is completely full stop adding hot wort. NOTE: Adding the wort slowly while it is hot is crucial in avoiding off flavors in your finished beer caused from hot side aeration. These flavors are typically associated with a wet cardboard flavor, once they are in your beer they are in for good.
- Close or cover the output tube, some people use tape, a brass ball valve or a small cork or rubber stopper that fits the internal diameter of the plastic output tube.
- Let steep for 20 minutes.
- Open the output valve and the input valve, then create a siphon by sucking at the end of the tube after your chilling device. NOTE: Sanitizing the tube end you just sucked on it important to do before letting it touch the cooled wort.
- Once the wort is added to your fermentation vessel just go about business as usual, aerate once under 75 degrees F and pitch your yeast!
