Harvesting, Rinsing and Re-Pitching Yeast
One of the best ways for a brewer to save money is to reuse yeast. Liquid yeast, in particular, while offering a large variety of strains, can cost anywhere from $6.50 to $8 per vial. This can amount to 15-25% of the total cost of one 5 gallon batch!
Before we outline our process, here are a few storage and temperature guidelines as recommended by White Labs.
How long can the yeast be stored? The best case scenario is to use the yeast within 1-3 days. Again, this is often not possible, especially if multiple strains are being used in the brewery. The magic number seems to be two weeks. If less than two weeks, brewers will usually have no problem reusing yeast. Over two weeks and you may or may not have problems. After four weeks, the viability of yeast slurry is usually 50% or lower.
As yeast sit in storage, they consume their glycogen reserves. Glycogen deprivation weakens their cell walls and makes them more susceptible to rupture. Cold temperatures retard this process, but you want to avoid freezing yeast, as ice crystals will also rupture cells. The ideal storage temperatures range is between 33-38F. When yeast rupture, they release their contents into the liquid phase. Bacteria can feed off the nitrogen released, and multiply rapidly. So the yeast slurry needs to be as contamination-free as possible when stored. Cold temperatures will also help retard bacterial growth.
Collection (Harvesting)

|
|
Rinsing Steps
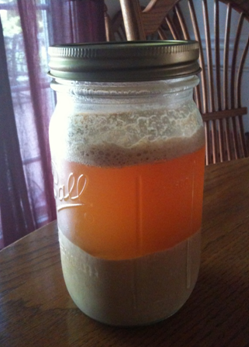
Yeast collected and flocculated ready for beer decanting
|
Prepare Rinsing Water
|
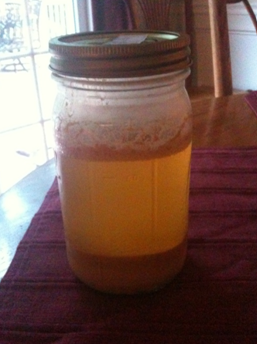
Yeast after shaking, settling, and decanting suspended yeast (throwing away trub)
|
Add Water
|
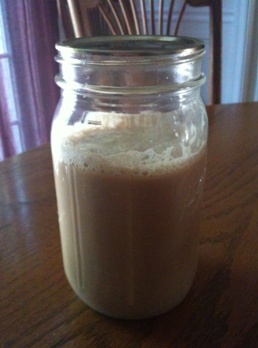
Yeast settled in storage container
|
Label And Store
|
Re-Pitching Yeast
- Use a yeast calculator to estimate how much yeast to pitch. Our favorite is Mr. Malty (courtesy of Jamil Zainasheff).
- If you harvest on a Saturday or Sunday and brew the next weekend, you may not need a starter.
- If more than a week since harvest, wake up yeast with a little wort (4 hrs prior, 1g DME per 10ml water ratio)
- If more than 2 weeks since harvest, create a starter.
- You can use yeast nutrient if you like.
