Oh $&@!, I need a starter!!!
This has happened to me and others many times. You get excited and plan all week for a brew day. You get some grain, some hops and a vial or two of yeast. A couple days before, you remind yourself that you need to make a starter that night since you normally make one the old fashioned way or because you ran out of pre-made pressure cooker starters. Then you get home and remember that your kid has soccer practice or you have an important meeting with the city to permit Stone to build a brewery in your back yard. Time is a premium and you need a quick starter. The solution... the microwave. It surprises me how the microwave is overlooked in the brewing process. It's like watching an episode of Mad Men. People whip out their pots and ice to make starters. That's just too much hands on for me. Using the microwave takes the pain out of watching a flask or pot on the stove.
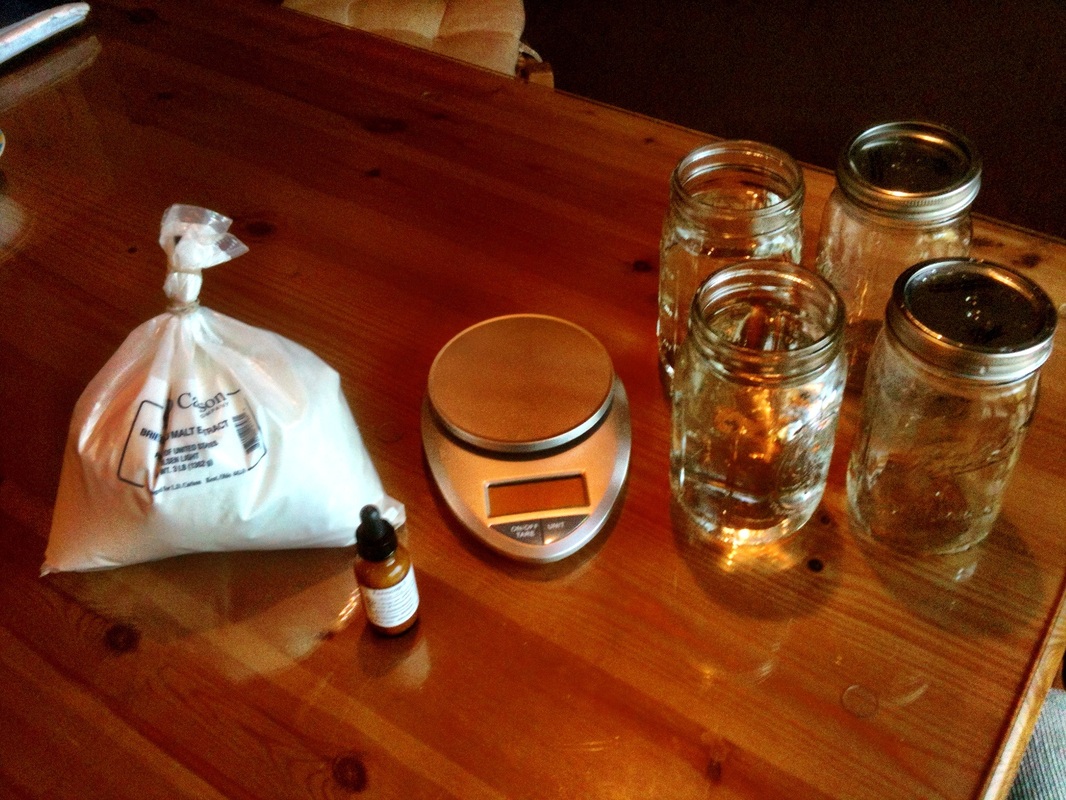
What you need
|

|
Mason jars. If you don't have them, get some. They're less than $10 for 12, can handle high heat and are a perfect way to store wort, hops or sterilized water. I like the wide mouth jars. You'll also need a scale, some DME and most importantly, Fermcap-S.
One of the main challenges of a microwave is boil over control. Fermcap-S eliminates boil overs. It also reduces boil overs when brewing and minimizes the Krausen at the peak of fermentation. If you don't have this in your arsenal, you need it!
One of the main challenges of a microwave is boil over control. Fermcap-S eliminates boil overs. It also reduces boil overs when brewing and minimizes the Krausen at the peak of fermentation. If you don't have this in your arsenal, you need it!
The Process
Step 1
Measure out and pour 80 grams of DME in the mason jars that will contain the wort. Quart mason jars are great since they measure up to 800 ml, so a good way to remember how much DME is to take the volume of a mason jar divided by 10.
Measure out and pour 80 grams of DME in the mason jars that will contain the wort. Quart mason jars are great since they measure up to 800 ml, so a good way to remember how much DME is to take the volume of a mason jar divided by 10.

Step 2
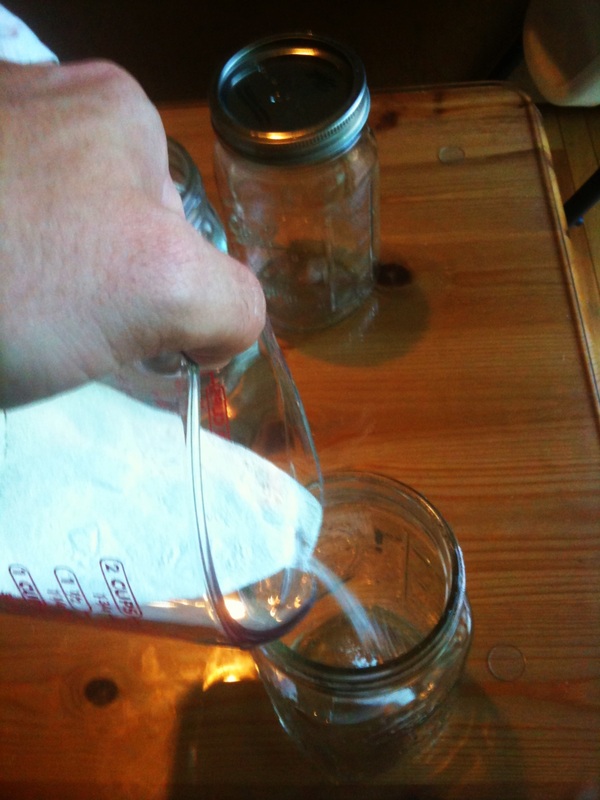
Add 200 ml of water and swirl it up. Think of it like a partial boil. We'll add water back later but now we want to minimize the risk of a boil over.
Add 200 ml of water and swirl it up. Think of it like a partial boil. We'll add water back later but now we want to minimize the risk of a boil over.
Step 3
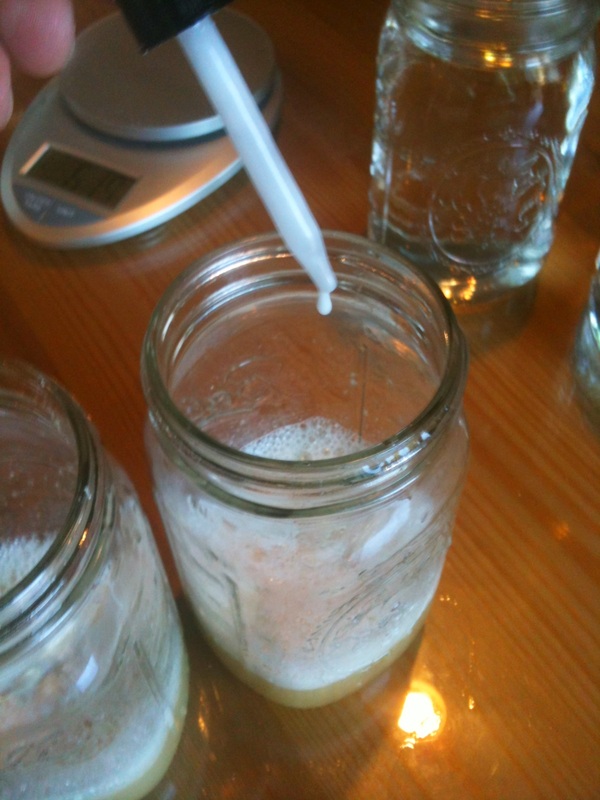
Add a drop or two of Fermcap-S. This stuff is messy, so be careful or you'll accidentally add five or six drops.
Add a drop or two of Fermcap-S. This stuff is messy, so be careful or you'll accidentally add five or six drops.
Step 4
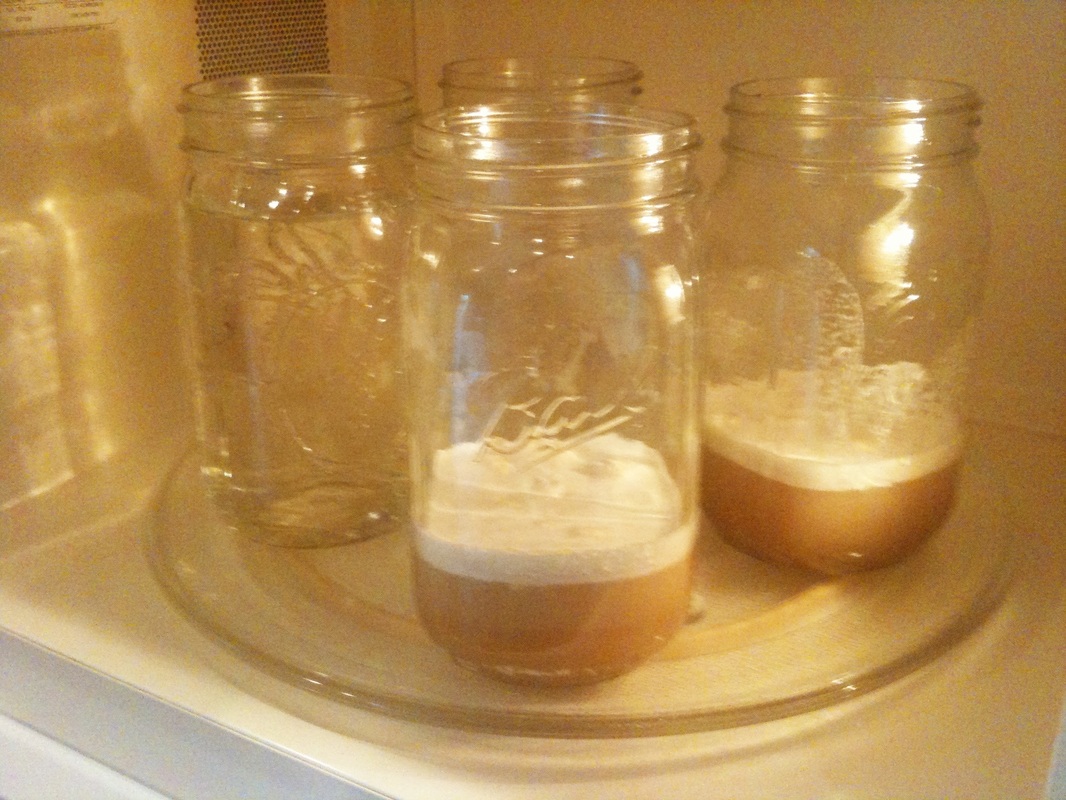
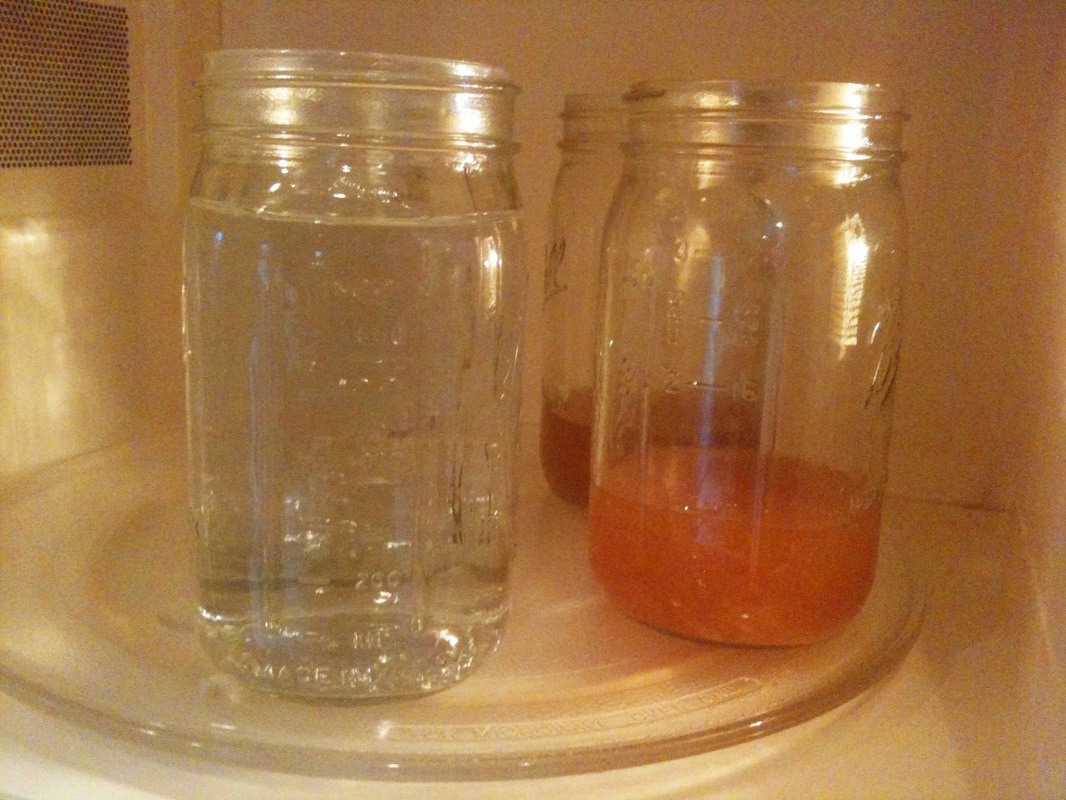
Stick the wort in the microwave. Now you probably noticed the other jars with water. I put these jars in to boil water. Then I fill the wort jars with it. This is optional since Fermcap-S should prevent a boil over if you fill it all the way up. I'm paranoid and I don't want to watch it so I do a partial boil to be sure.
Stick the wort in the microwave. Now you probably noticed the other jars with water. I put these jars in to boil water. Then I fill the wort jars with it. This is optional since Fermcap-S should prevent a boil over if you fill it all the way up. I'm paranoid and I don't want to watch it so I do a partial boil to be sure.
Step 5
Boil it up. My microwave sucks so this takes about ten minutes. Regardless, it doesn't matter if it's five minutes or twenty minutes, you don't have to watch it. Feed your kids, take a quick shower... whatever.
Boil it up. My microwave sucks so this takes about ten minutes. Regardless, it doesn't matter if it's five minutes or twenty minutes, you don't have to watch it. Feed your kids, take a quick shower... whatever.
Step 6
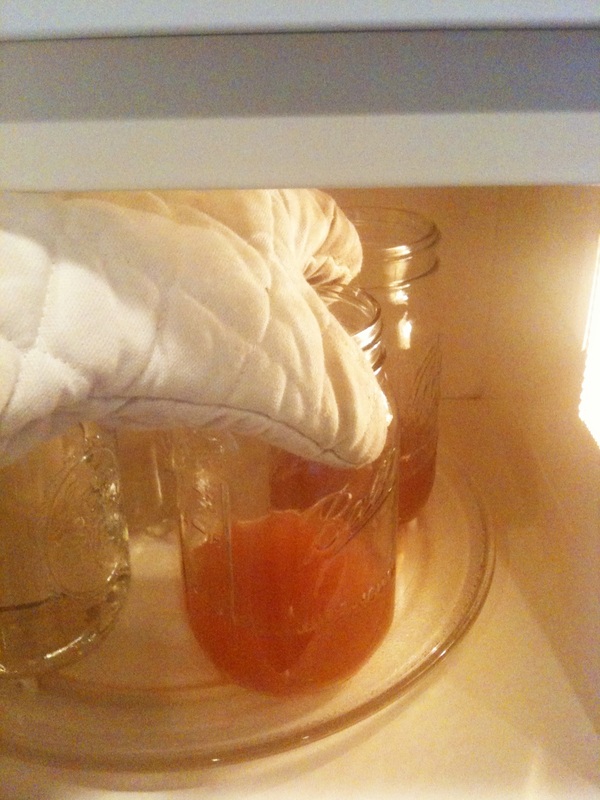
Take the wort out.
Take the wort out.
Step 7
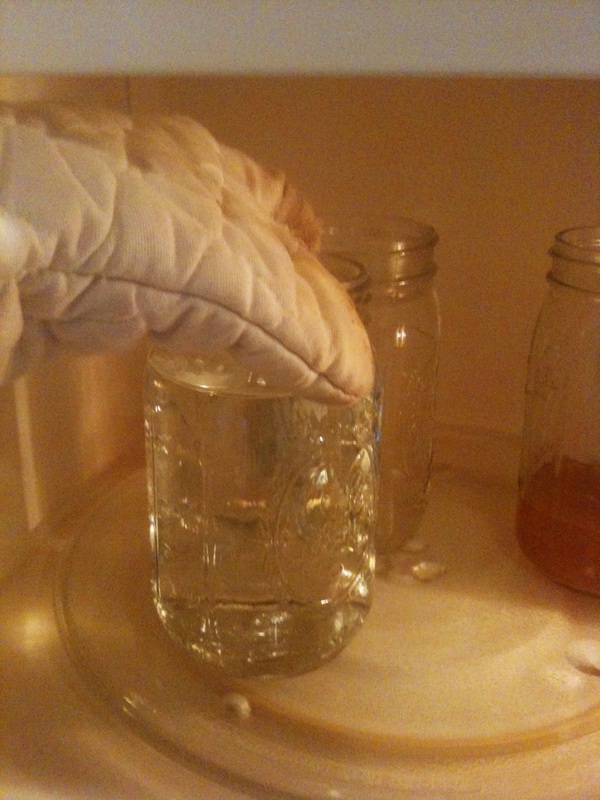
Take the water out.
Take the water out.
Step 8
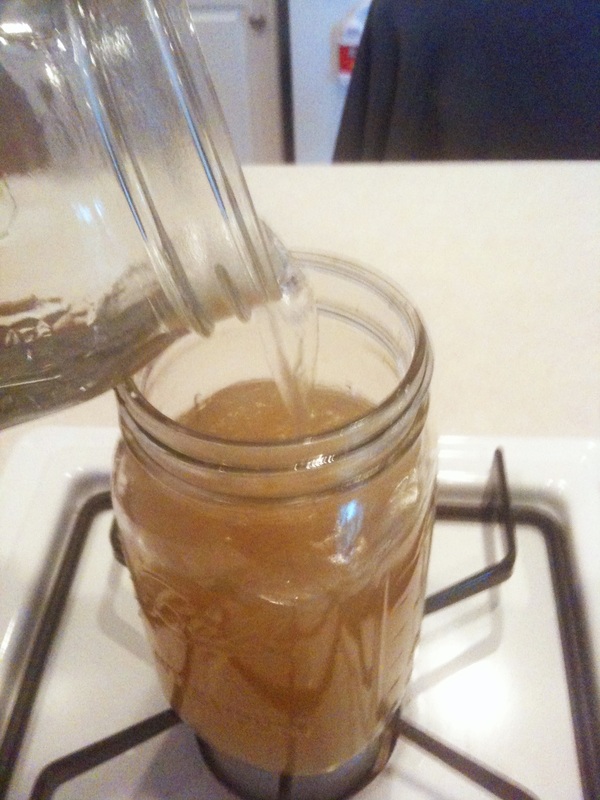
Pour the water in the wort to about 800 ml.
Pour the water in the wort to about 800 ml.
Step 9
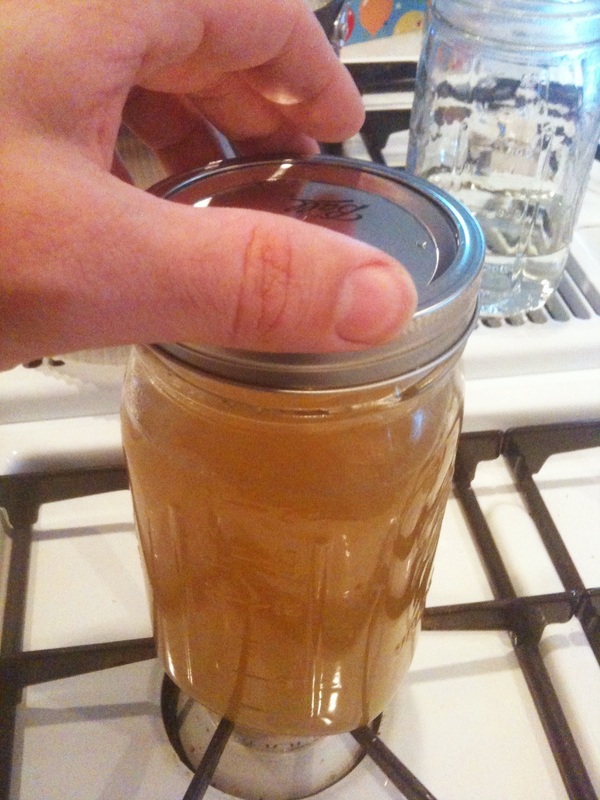
Close up the jars. Careful, they're hot!
Close up the jars. Careful, they're hot!
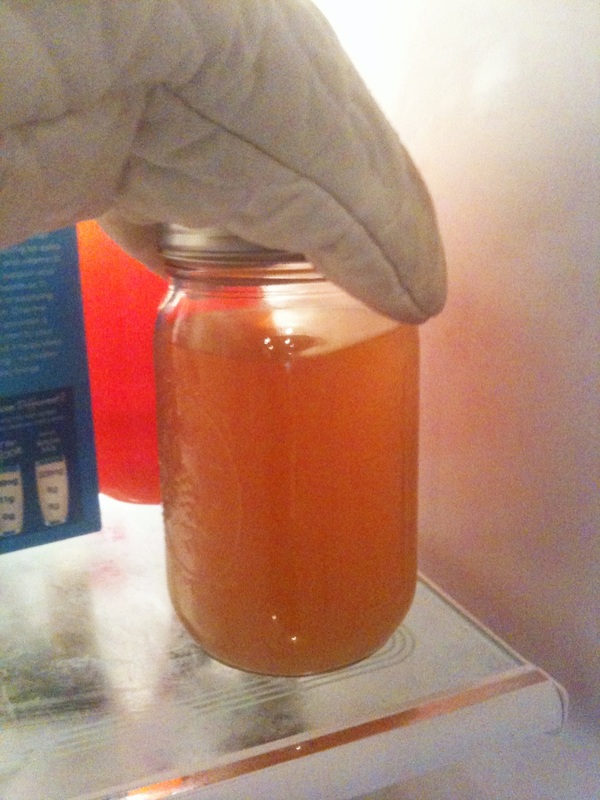
Step 10
Put them in the fridge and that's it! In a couple hours, they will be ready to pitch!
This is a great way to prepare a few starters, especially if you plan to step up. Now I must caution you that this method should only be used if you plan to use the starter within a week. If you're looking for long term starter storage go here. Wort, is not acidic and you do run a slight risk of Botulism if stored for long periods of time. Cooking your wort in a pressure cooker at 250 degrees is the only way to prevent this.
