$30 Hopback - by trigger
I know there are several threads on hopbacks, but I didn't see a blow by blow how to, so here's how I did it. I won't include in and out fittings, since those will be dictated by your particular system.
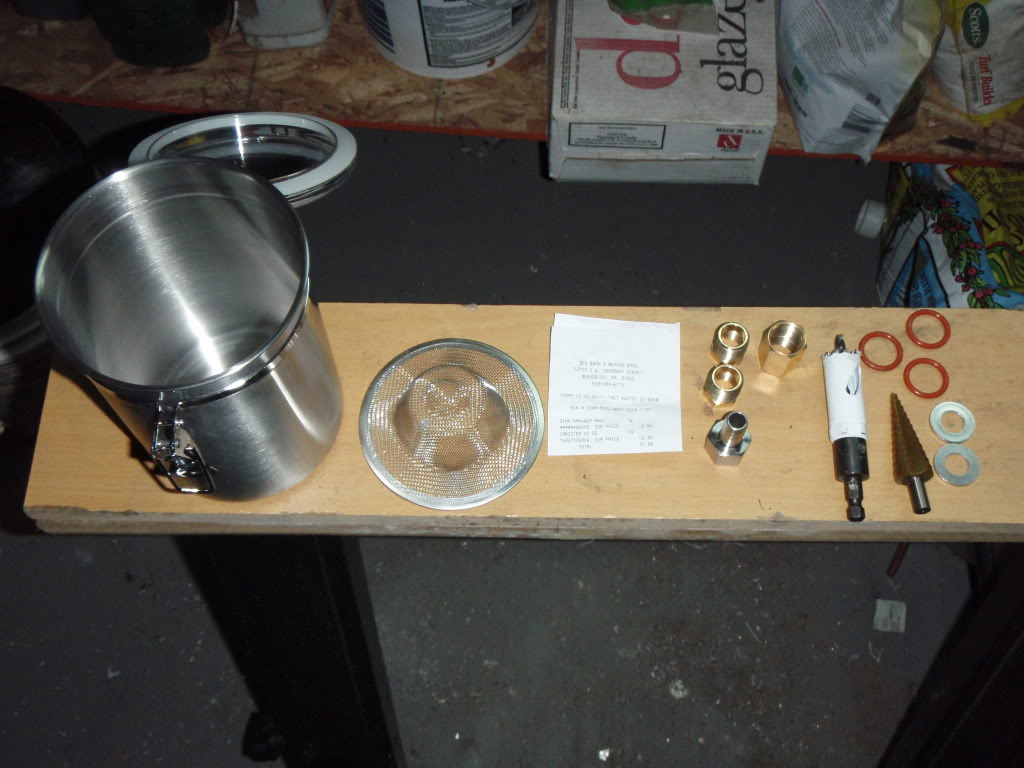
Shopping list:
Shopping list:
- 60 oz stainless canister - bedbathandbeyond - $13
- Stainless sink strainer - bedbathandbeyond - $3 (I couldn't find this on the website, but it was in the store)
- 2 ea 1/2" x 3/8" npt bushing - homedepot - $5
- 1/2" fpt x 1/2" fpt coupler - homedepot - $5
- Silver solder and flux (already had these)
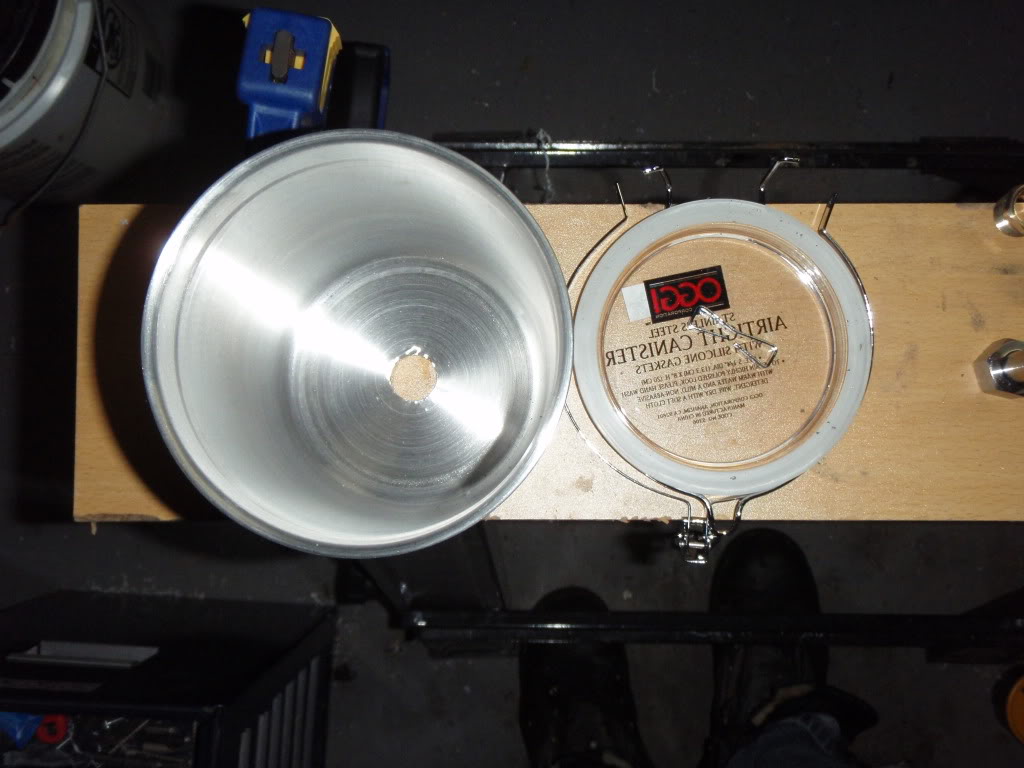
First up was to disassemble the canister by pinching the wire that wraps around the lid, followed by removing the bowtie shaped clamp that holds the band in place, and finally removing the band with latch.
Set these aside.
Set these aside.
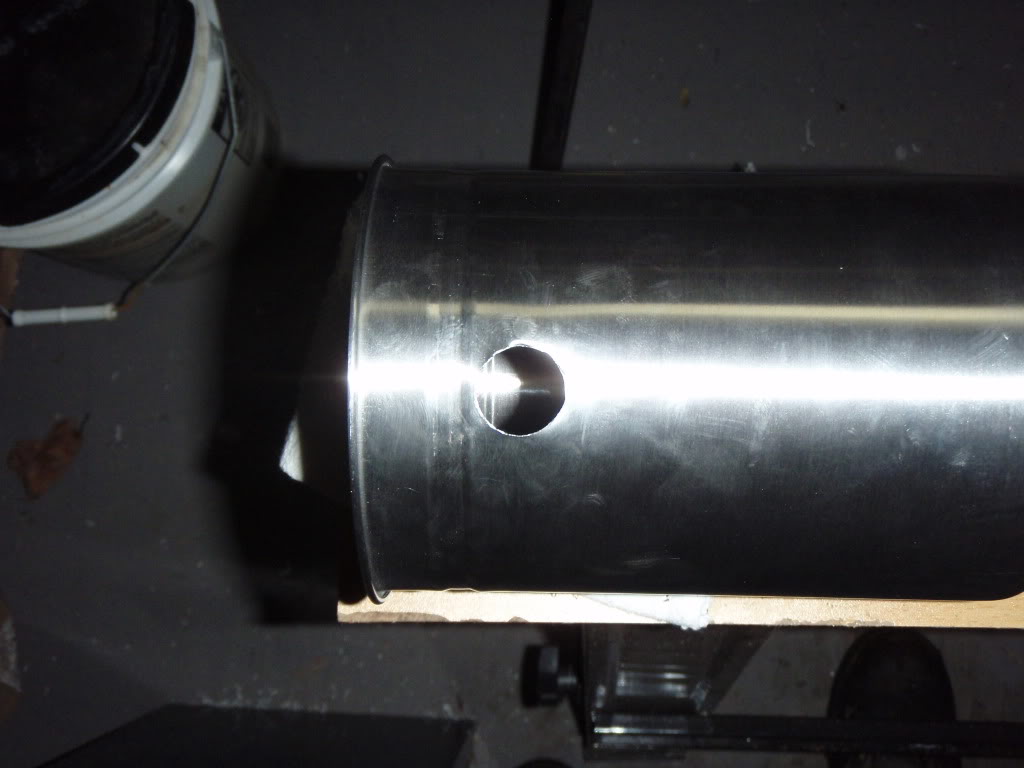
Next, mark the location for the in and out fittings. The in should go as close to the recess that the band sits in as possible without the fitting contacting the recess. The out will be centered in the bottom. Once these are marked hit them with a center punch carefully. The canister is made of very thin material, so not a lot of force is needed here. Once you have these marked drill them out to 13/16". For this I used a 1/8" drill, followed by a 3/8", followed by a step bit. You have to be very careful drilling these holes, as the thin material of the canister is easily mangled. I suggest using very light pressure and very slow drill speed. The goal in this step is to make a clean hole without mangling the material, so take you time. This is what you want when finished.
After you have two clean hole drilled clean them up with a rattail file followed by some 60 grit sandpaper.
After you have two clean hole drilled clean them up with a rattail file followed by some 60 grit sandpaper.

When the holes are cleaned test fit the two bushings. They should thread in to the holes. If not, or if there is a lot of resistance carefully open the holes a bit at a time with a file. Go very slowly, as you can easily get them out of round. Make sure to follow any filing with the sandpaper to debur.
Once you have a nice snug but not tight fit, coat the outside of the bushings in a decent layer of flux along with the inside of the canister around the holes. Thread the fittings through from the inside, and turn them all the way down until the hex end contacts the canister material. Now heat the fitting with a propane torch. Keep the tip of the flame a couple inches from the fitting to avoid burning the flux and keep the flame moving. Don't worry about heating the canister, the material is thin enough that it'll be plenty hot. As soon as the solder flows take the flame off. I found that I had the best success clamping the canister to my sawhorse so that the fitting I was working on was facing downward and applying the solder around the hex portion of the bushing. If you used enough flux and didn't burn it the solder should flow around and seal the fitting. If you're like me and use way too much solder you can take it off easily with a stainless wire brush in a drill. I got mine from Harbor Freight. When you're done soldering the fittings in you should have something like this.
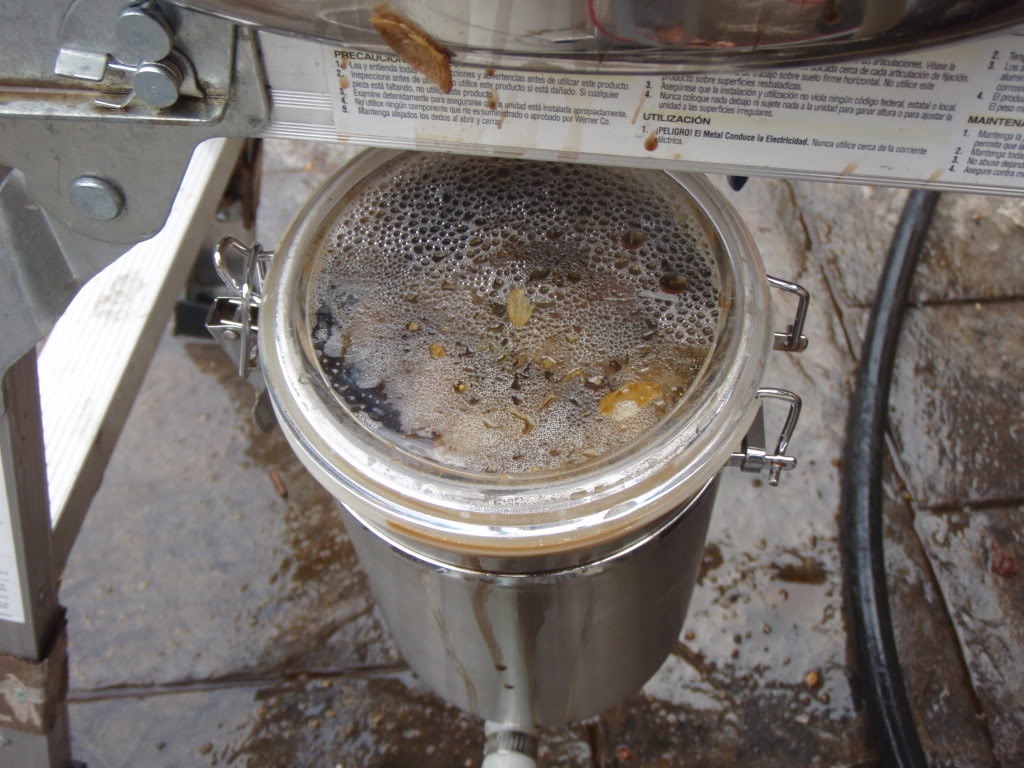
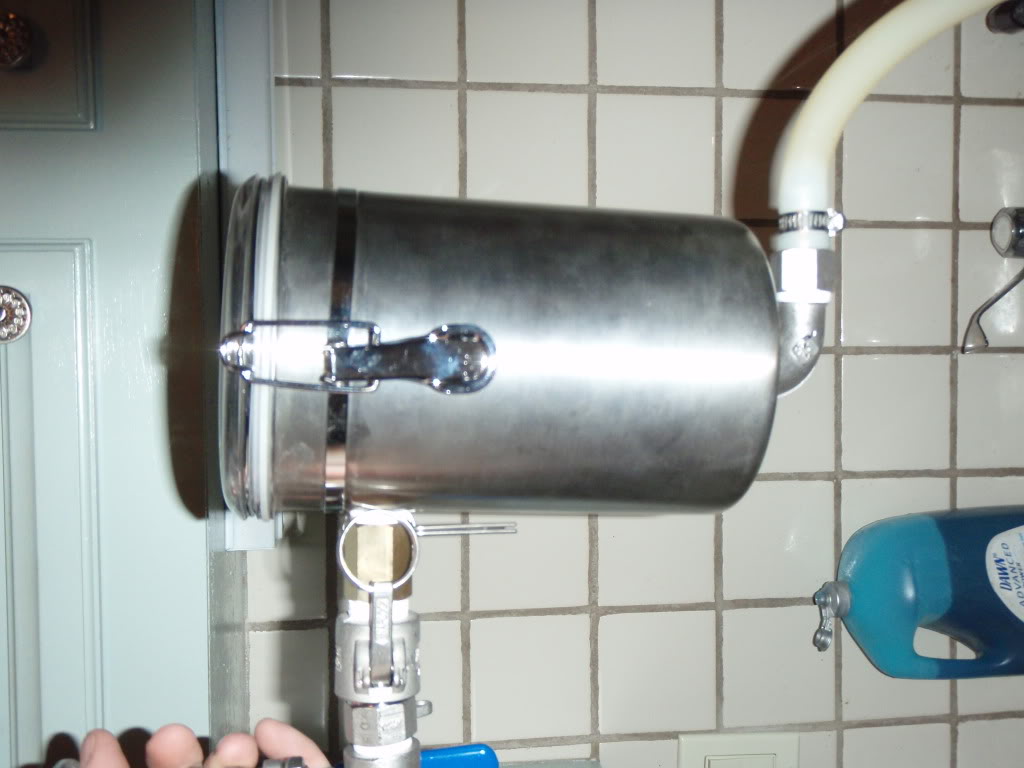
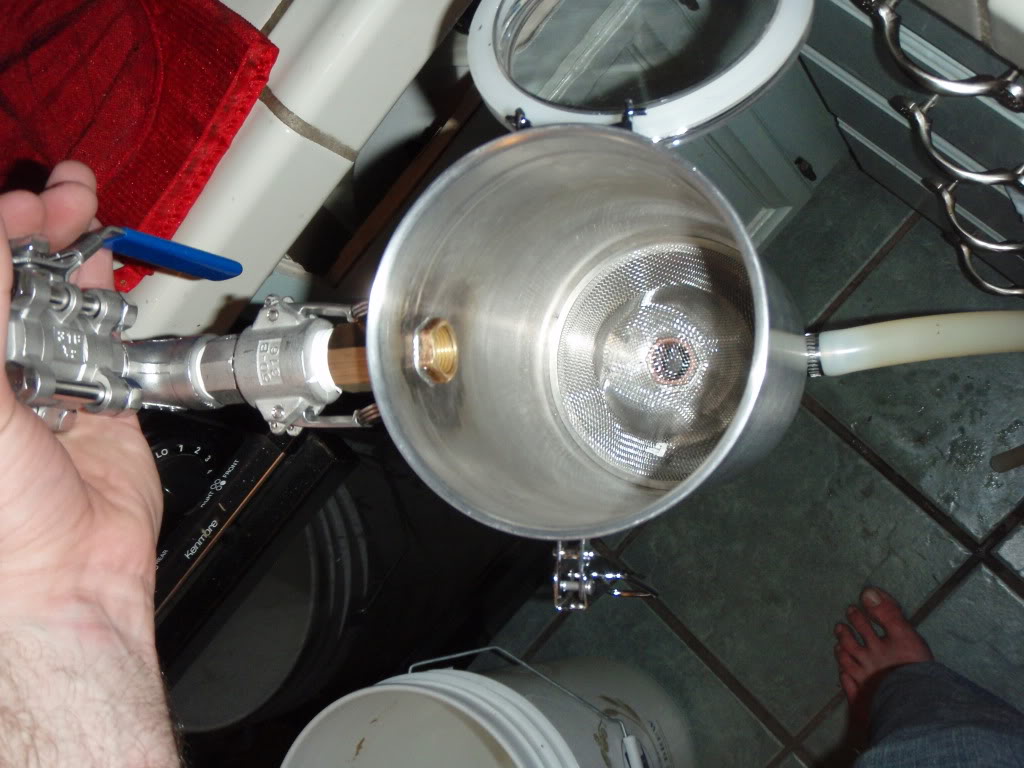
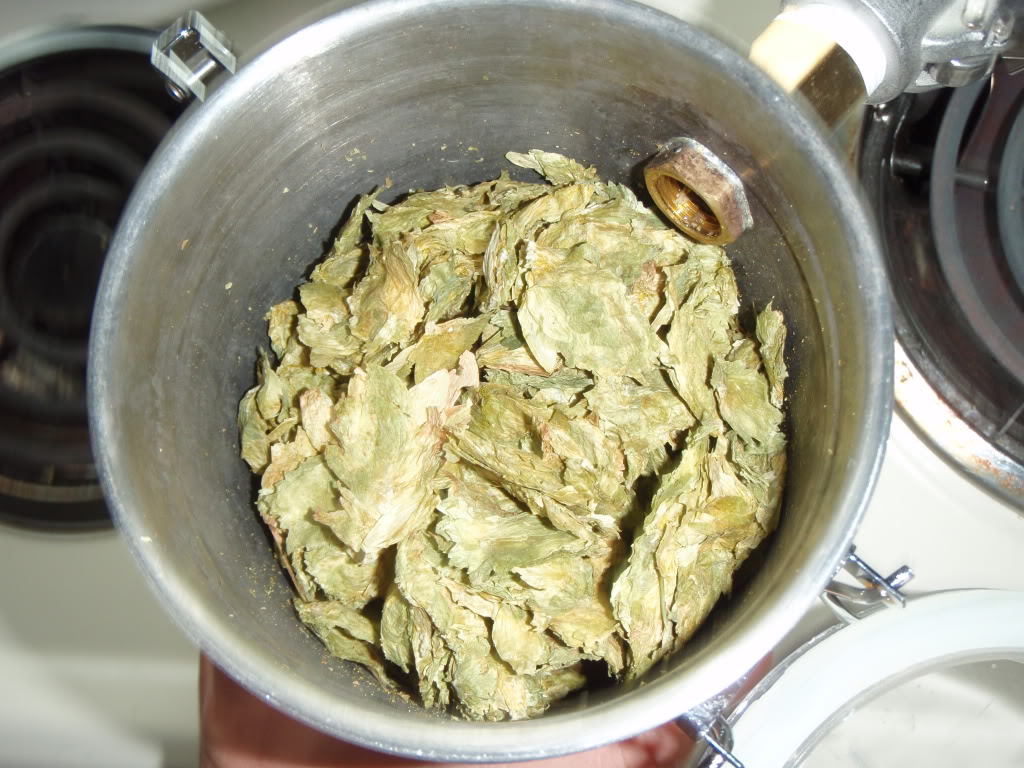
Wipe you're joints with cold water when they're still hot but the solder has solidified. When everything is cool attach the female couler to the bushing in the side and reassemble the lid. Then go ahead and attach your in and out fittings. I have camlocks on my system, so I put the female camlock on the in port, which will allow the hopback to hang from the kettle out valve. For the out fitting I went with a street elbow with a nipple to which I hooked a length of silicone hose (and another female camlock to go to my pump). This part is up to you and your system design. Just drop the sink strainer inside and you're done. Here's the finished product
Once you have a nice snug but not tight fit, coat the outside of the bushings in a decent layer of flux along with the inside of the canister around the holes. Thread the fittings through from the inside, and turn them all the way down until the hex end contacts the canister material. Now heat the fitting with a propane torch. Keep the tip of the flame a couple inches from the fitting to avoid burning the flux and keep the flame moving. Don't worry about heating the canister, the material is thin enough that it'll be plenty hot. As soon as the solder flows take the flame off. I found that I had the best success clamping the canister to my sawhorse so that the fitting I was working on was facing downward and applying the solder around the hex portion of the bushing. If you used enough flux and didn't burn it the solder should flow around and seal the fitting. If you're like me and use way too much solder you can take it off easily with a stainless wire brush in a drill. I got mine from Harbor Freight. When you're done soldering the fittings in you should have something like this.
Wipe you're joints with cold water when they're still hot but the solder has solidified. When everything is cool attach the female couler to the bushing in the side and reassemble the lid. Then go ahead and attach your in and out fittings. I have camlocks on my system, so I put the female camlock on the in port, which will allow the hopback to hang from the kettle out valve. For the out fitting I went with a street elbow with a nipple to which I hooked a length of silicone hose (and another female camlock to go to my pump). This part is up to you and your system design. Just drop the sink strainer inside and you're done. Here's the finished product
All in all this is a very easy project to complete. If you want you can go weldless, as I originally planned. I found that the curvature of the relatively small vessel was problematic in getting a good seal. Either the fitting would be tight enough and that would cause the canister to deform enough that the lid wouldn't get a tight seal or the fitting would be loose and leak. This doesn't matter for the bottom seal, since it's on a flat surface. Also, the weight of the full hopback torqued pretty hard on the weldless input, whereas the soldered fitting takes the weight just fine.
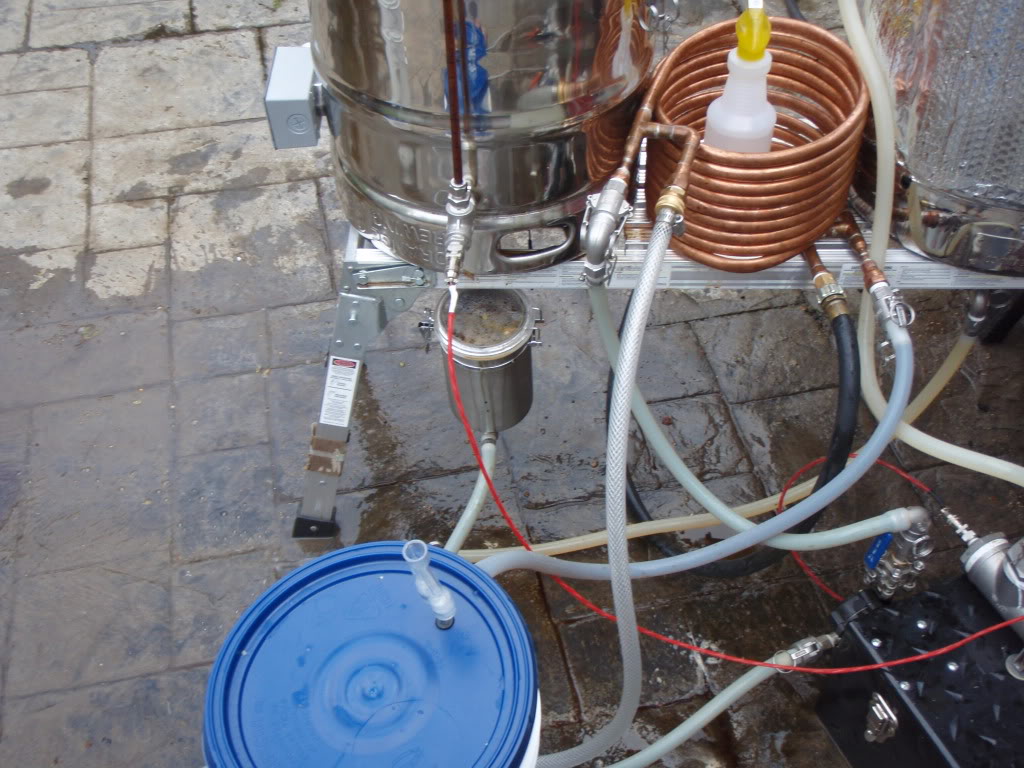
Pics of Brew Day
Well, here's pictures from last weekend's brew. I did another batch of CDA. The former batch suffered from some crush issues, so I'm renaming it an India Brown Ale. It tastes great, and the aroma without dryhopping is amazing. It's not quite the same as a freshly dryhopped beer, kind of more integrated but equally as intense.
I tightened up the lid but it still won't hold positive pressure. Better than before but it still leaks a bit if I leave the kettle dump fully open due to the restriction in the chiller. All in all though, I'm really happy with it.
I tightened up the lid but it still won't hold positive pressure. Better than before but it still leaks a bit if I leave the kettle dump fully open due to the restriction in the chiller. All in all though, I'm really happy with it.