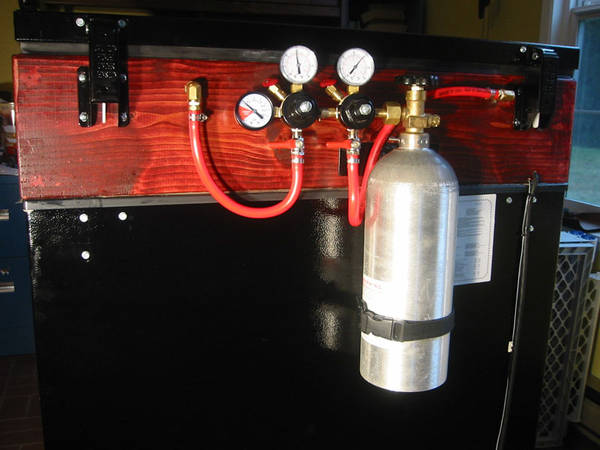
A Frigidaire 7.2 cu ft Chest Freezer - by Quaffer
I was inspired by several freezer conversions and I decided to build my own collared freezer conversion with the following goals:
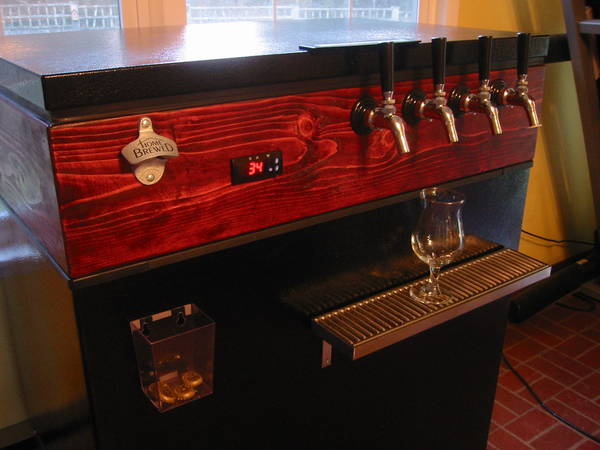
So let's start at the end with the finished project. Here's a closeup of the collar and taps.
- At least four taps. I expect to have several brews going at once, plus a soda tap for the kids from time to time.
- Two different CO2 pressures so that I can carbonate at high pressure and serve at low pressure at the same time.
- It needs to be portable since I cannot dedicate a specific place in my home to this thing.
- It should be easy to build. I don't have the skills nor time to take on an epic woodworking project. Anyone with basic DIY skills can build this project. Really.
- It should not be ugly. I want to be able to have this in my living room without being embarrassed. You be the judge.
So let's start at the end with the finished project. Here's a closeup of the collar and taps.
The collar is built from 2x8 inch Western Hemlock lumber, stained with Zinsser Cabernet wood stain and two layers Minwax polyurethane semi gloss. It has a Starr bottle opener with transparent bottle cap catch, a Love temperature controller, and four Perlick forward sealing faucets 525SS. There is a 19.25" s.s. drip tray attached to the kegerator wall by three angle brackets and heavy duty double-sticky foam tape. The foam tape should hold five lbs. The drip tray has not budged at all.
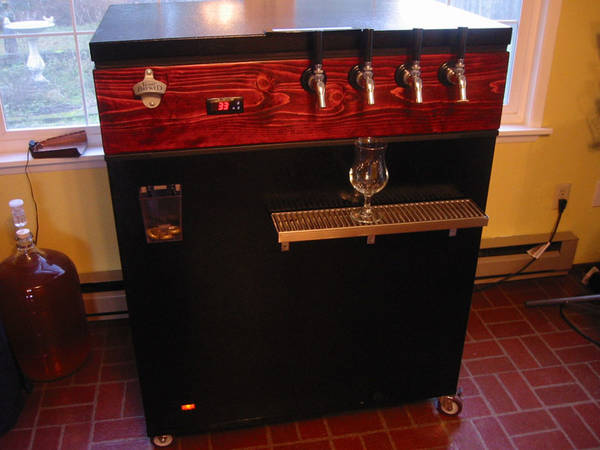
Next picture shows the front of the kegerator including the casters.
Next picture shows the front of the kegerator including the casters.
It was difficult to photograph the kegerator and do the colors justice. The black color tends to increase the lighting requirements, but increased lighting makes the collar glow with an unnatural bright orange color. These pictures represent the best compromise I could achieve between the natural colors of the kegerator and illumination quality.
I decided to base the kegerator on a brand new Frigidaire 7.2 cu ft chest freezer from Lowe's. This saved a lot of time by not having to restore an older beat-up freezer, and this model is reasonably priced.
Oh yes, before I get comments on the low serving temperature, I was actually not serving beer when these pictures were taken, but cold-crashing a fermenter before kegging.
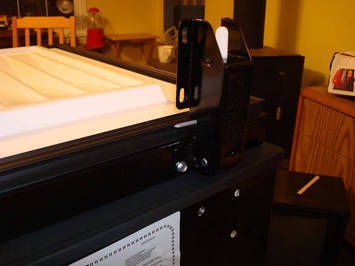
Before removing the lid, insert nails in the hinges to prevent them from flying open as you remove the screws. You can see a nail I put in a hole on the hinge in this picture.
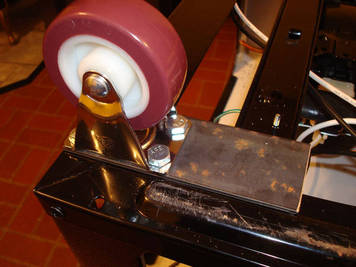
I wanted to mount the casters discretely to make it look like they were original equipment. The next picture shows one of the 3" fixed casters installed on the bottom frame. The frame is too flimsy to be able to support the casters directly so I had to make reinforcements from 0.125" thick steel bar.
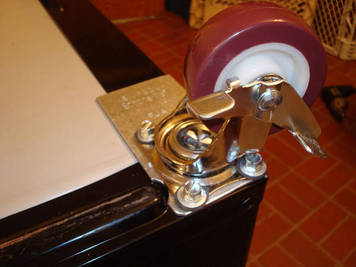
This picture shows one of the swiveling casters with brake, installed on reinforcement cut from a Strongtie I found at the home improvement store. I had to cut a notch in the steel to clear the foot.
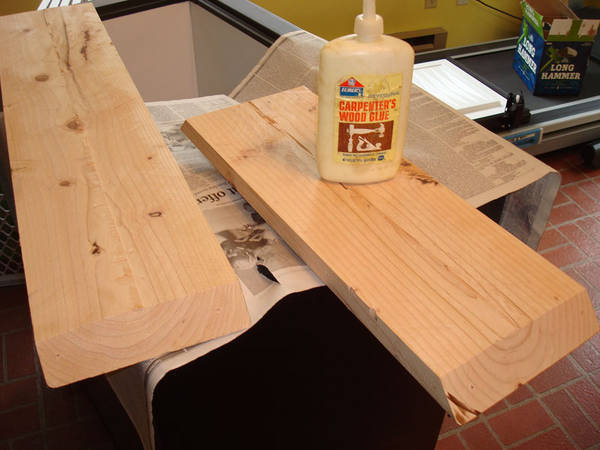
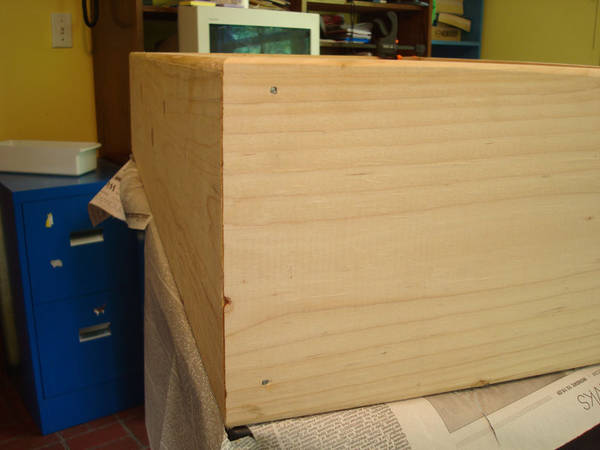
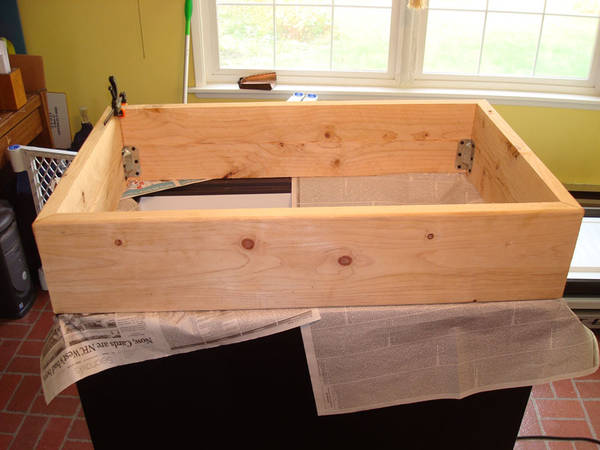
I built the collar on top of the freezer so that I could check that everything lined up. The boards are Western Hemlock 2x8, thinned down to 1.25" thickness on a table saw. The lid seal is one inch wide so I provide an equally wide area on top of the collar for it to seat against. I made an additional allowance of 0.25" for the round-over already present on the outside of the board. This allows enough width for the seal to completely seat, and it maximizes the thickness of the foam boards I can put inside the collar.
I predrilled holes and used finishing nails to hold the mitered boards together. This helps prevent something slipping as I assemble it. I found out the hard way not to spackle the nail heads. The area touched by spackling will absorb stain differently than the surroundings, even though it is invisible before staining. I had to spot sand around the nail heads and restain to fix it.
Here's the collar assembled with steel reinforcements in the inside corners. The reasons the corner reinforcements are not centered vertically is that there is a ridge where the saw blade met itself as I flipped the board over to cut from the other side. In the back I have a clamp holding a sliver in place for gluing, which I had knocked out dropping the board on the floor.
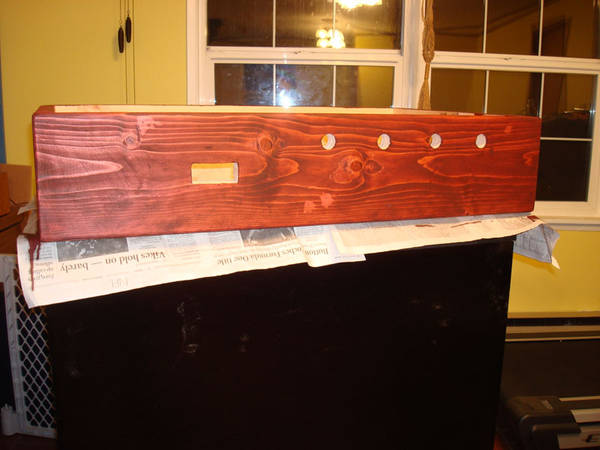
Here's the finished collar with a coat of Zinsser Cabernet wood stain. The collar glows in an unnatural orange because of the strong photo flash. You can see the cutout for the Love temperature controller and four holes cut by a 1" hole saw on 4" centers. I put the taps as high as I could get away with because additional height is a good thing on collared freezer conversions, which can tend to be a little low for comfort and esthetics.
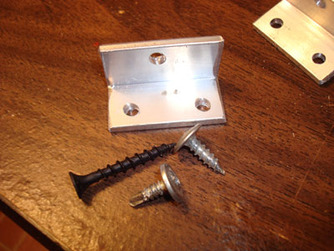
I made cleats from an 0.75" angle aluminum bar. The one large screw will go into the wood of the collar, while the smaller self-drilling screws will go into the plastic frame on the freezer body.
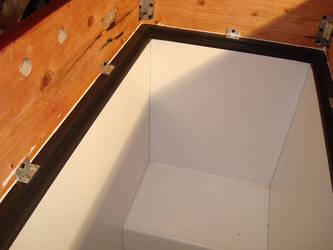
Here the collar has been set on a bed of adhesive caulking and held in place by several aluminum cleats. I also applied a bead of caulking around the inside of the collar to prevent any spills or condensation to get under the wood. By the way, the wood inside has one coat of polyurethane to improve its moisture resistance.
Wiring
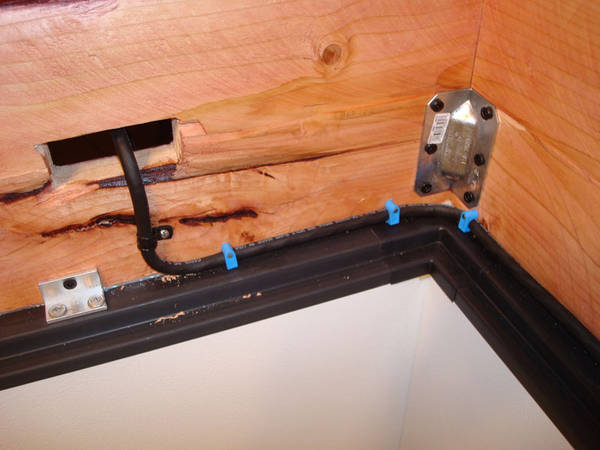
I ran an electrical cable from the temperature controller site, around the corner and towards the back of the collar. Cable clips hold the cable in place.
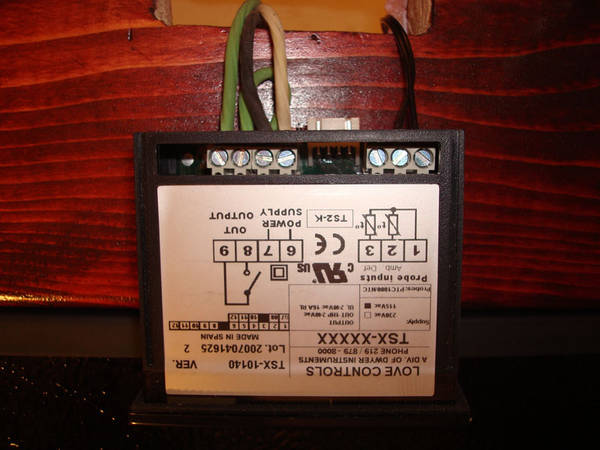
The Love temperature controller is hanging from its wires. On the right are two wires for the temperature sensor, on the left are three wires for 110VAC electrical power and the relay output. White is neutral, black is live, a green jumper connects the live to one of the relay switch terminals, and the final green wire carries the switched power down to the compressor.
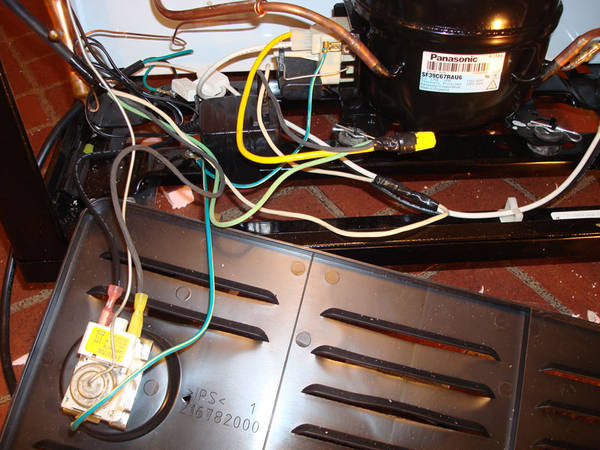
Here is the compressor compartment with wiring before modification. I have a wall bug laying loose on the frame which will eventually power the internal fan. Incoming power cord from a wall outlet can be seen on the left. The green wire is ground and attaches to the frame. The white wire is neutral and is spliced to the compressor and the power-on light on the front of the freezer. The barely visible black wire is live 110VAC which is spliced to the original thermostat in the foreground and to the power-on light. The cable from the Love controller is coiled up on top of the compressor.
This is the picture after modifying the wiring. I spliced the white neutral wire using a solder junction. One of the white wires go to the Love controller, the other is soldered to one of the wall bug prongs and then wrapped in electrical tape. The wall bug is secured to the frame with several turns of electrical tape. The live wire is, as previous, connected to the original thermostat, the other thermostat terminal feeds the Love controller via the black wire in the cable. This way I can use the original thermostat like a switch to power down the system.
The Love controller provides switched power on the green wire which is connected by a yellow wire nut to the compressor and to the last prong on the wall bug. This allows the fan to run when the compressor runs, and stop when the compressor stops. I like this rather than having it run all the time because the electrical energy given to the fan is dissipated as heat inside the kegerator, making it less efficient.
The Love controller provides switched power on the green wire which is connected by a yellow wire nut to the compressor and to the last prong on the wall bug. This allows the fan to run when the compressor runs, and stop when the compressor stops. I like this rather than having it run all the time because the electrical energy given to the fan is dissipated as heat inside the kegerator, making it less efficient.
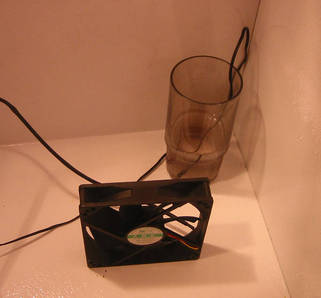
The wall bug is a 6V DC unregulated model which outputs 7.7V DC when connected to my 12V fan. I found this to be ideal because the fan is very powerful, and unnecessarily so at 12V. We need just a moderate breeze from the fan to circulate the air in the kegerator.
I keep a partially filled glass of water in the fridge for the temperature sensor. This helps to slow down fast temperature fluctuations as I open the lid or the fan starting. If we have too much water in the glass it slows down the controller's response to temperature change too much and it will undershoot the set temperature.
I keep a partially filled glass of water in the fridge for the temperature sensor. This helps to slow down fast temperature fluctuations as I open the lid or the fan starting. If we have too much water in the glass it slows down the controller's response to temperature change too much and it will undershoot the set temperature.
Foam Panels
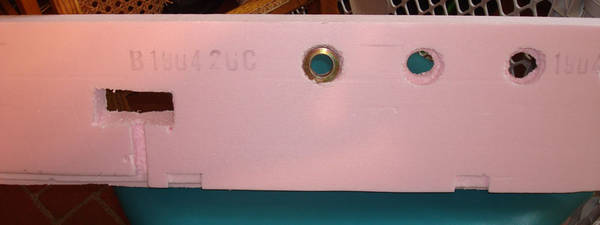
By thinning the collar to 1.25" I could fit 1.5" thick pink foam board inside the collar and still not encroach on the available space under the collar. In other words, the foam boards are almost flush with the inside freezer walls. The first picture shows the front foam board with cutouts for the faucets, the temperature controller, and its wiring. I also notched out spaces for the cleats to fit in. One brass nut from the faucets is test fitted in the hole for size.
|
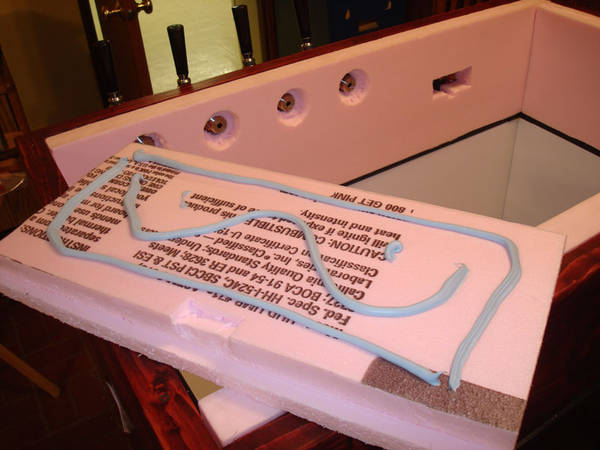
Here is a side foam panel with the special foam board adhesive applied. It goes on like tooth paste. The other three panels are already installed.
|
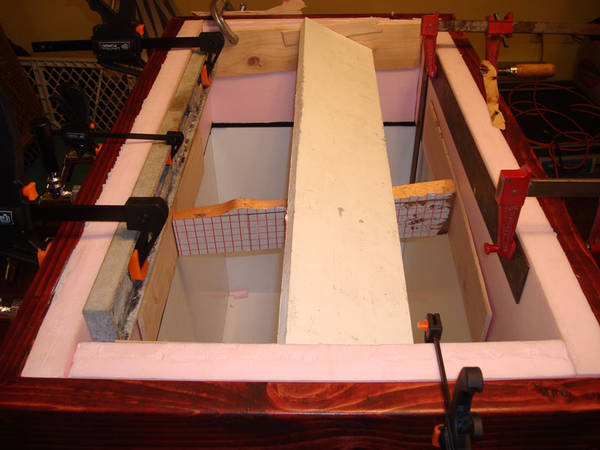
Because of that ridge left in the center of the collar boards by the table saw, it is a little difficult to hold the foam boards tight against the wood. I put up this contraption of braces and clamps to force the panels into place.
|
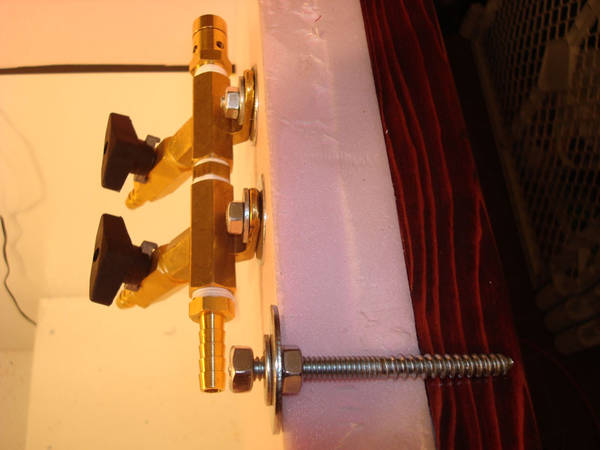
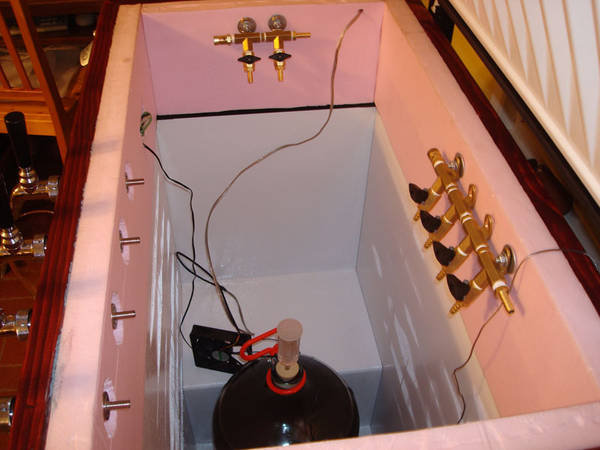
Here's the two-output manifold that I plan to use for high-pressure carbonation. It is held in place by two hanger bolts. A hanger bolt (shown) has a wood screw at one end and a machine screw at the other. It is installed in a pre-drilled hole, driven by a wrench and two nuts jammed together on the machine threads. Using hanger bolts allows me to easily detach and reinstall the manifolds should it become necessary.
Here's the two-output manifold that I plan to use for high-pressure carbonation. It is held in place by two hanger bolts. A hanger bolt (shown) has a wood screw at one end and a machine screw at the other. It is installed in a pre-drilled hole, driven by a wrench and two nuts jammed together on the machine threads. Using hanger bolts allows me to easily detach and reinstall the manifolds should it become necessary.
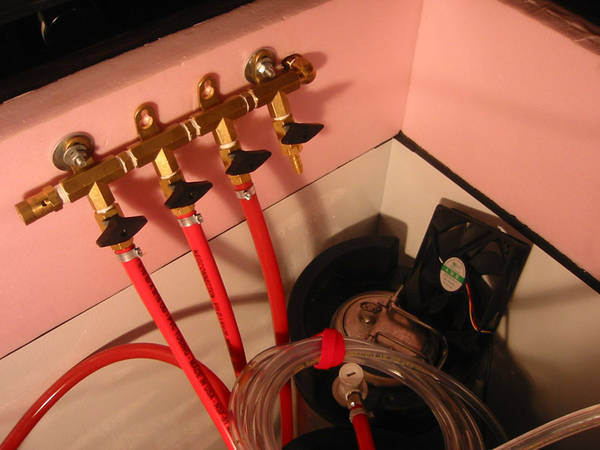
The four-output manifold is put into service. CO2 enters on the right through the back wall. The fan is now tilted upwards to circulate air into the warmer upper level which has no active cooling. You can also see a Velcro strap holding the 10' coil of beer line in place. These were designed for cable harnesses, but they really save my sanity preventing the beer lines to uncoil and tangle with everything.
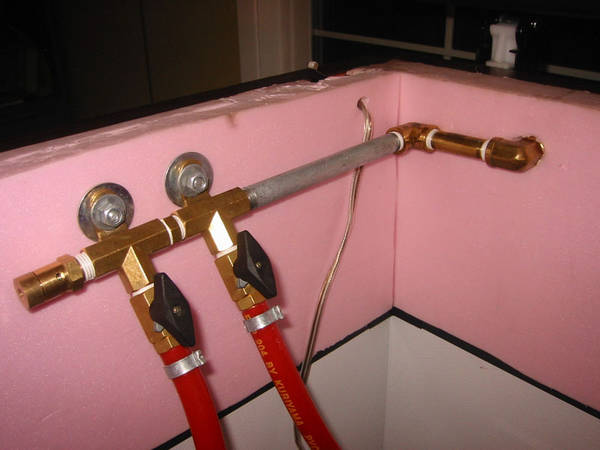
The left manifold is now plumbed with CO2 and carbonating a couple of kegs. The hardware store was out of the six inch long 0.25" brass nipples I needed, so I used a galvanized one instead. I may replace this at a later time with the proper brass one. In the back corner you can see the fan wire go though the foam board into a micro switch activated by the lid. The idea is to stop the fan when we open the lid. This prevents the fan from blowing the precious cold air out of the kegerator. It also makes it much easier to reposition the fan as needed. For now the fan runs with the compressor, but I am considering a dual temp sensor fan controller that starts the fan when the temperature differential between the high and low sensor exceeds a certain value.
Attaching CO2 Bottle
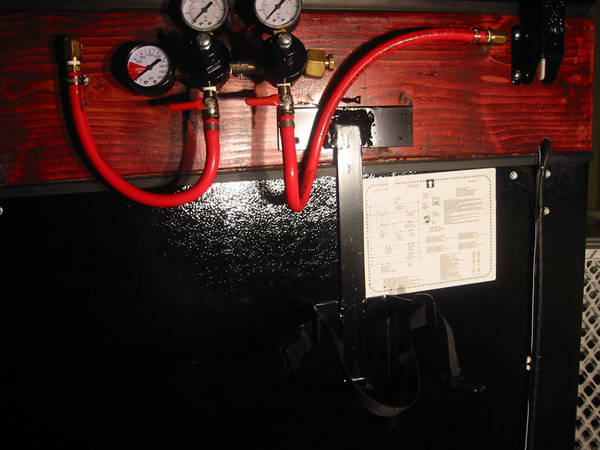
There is limited space inside the kegerator so I wanted to mount the CO2 bottle and regulators on the back wall. The CO2 bottle hanger is built from .125" thick steel bar stock using a stick welder. It has the form of the letter 'T', where the upper crossbar is attached to the collar with wood screws. I needed to use two layers of steel bar to build up enough height to get passed the plastic frame between the freezer body and collar. The bottom part of the hanger is bent up slightly more than 90 degrees to reach into the shallow recess on the underside of the bottle. The bottle hanger has two buckles that I pass a web strap through and hold the bottle securely in place. On the right you can see the power and fan cables attached to the wall by adhesive cable tie anchors.
|
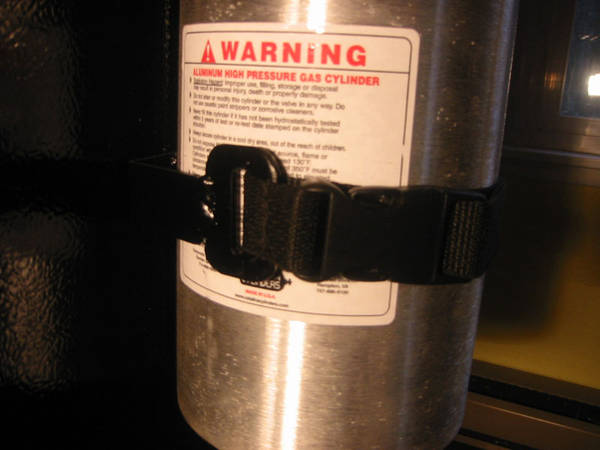
The picture above is a closeup on the web strap and buckle. The web strap passes through these metal pieces I welded on the end of the support bars. The support bars are bent outwards as seen from above to form a cradle for the CO2 bottle to sit in.
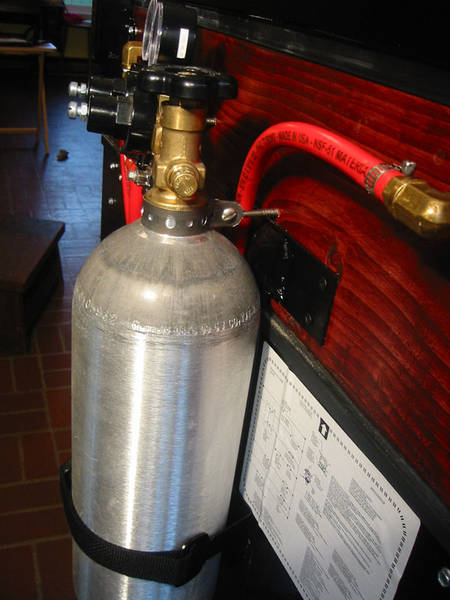
Shown right is how the CO2 bottle is held in place with the web strap down low and with a metal clamp, made from plumbers strap, up high. |
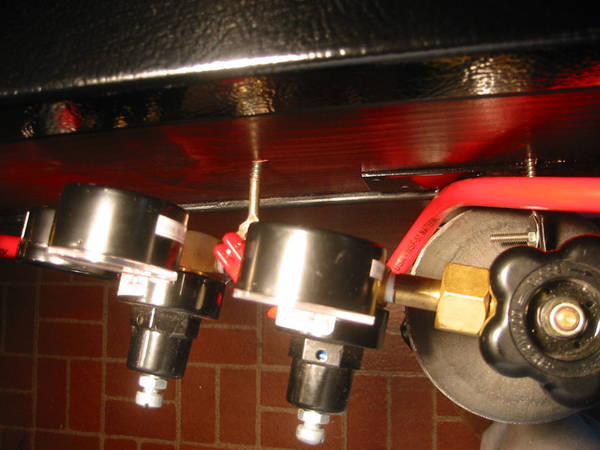
In the view from above we see that the regulator is angled in towards the wall. This to protect it from bumping into things as I push the kegerator around.
The CO2 bottle and the regulators are held in place by clamps, supported by eye lag screws. Eye lag screws are hard to find. At McLendons they knew what I wanted but they stopped carrying these some time back. At Home Depot they did not know what I was talking about. I ended up ordering a pack of 20 online at the Amazon marketplace, from ANTOnline.
The CO2 bottle and the regulators are held in place by clamps, supported by eye lag screws. Eye lag screws are hard to find. At McLendons they knew what I wanted but they stopped carrying these some time back. At Home Depot they did not know what I was talking about. I ended up ordering a pack of 20 online at the Amazon marketplace, from ANTOnline.
Build of Materials
Major components:
- Frigidaire 7.2 cu ft chest freezer, black, from Lowes
- 2x8 western hemlock lumber (HemFir), Home Depot
- Zinsser wood stain Cabernet, Lowes (I cannot find it anymore)
- Minwax polyurethane, clear semi-gloss, Lowes
- 3" polyurethane rigid caster, Harbor Freight Tools
- 3" Polyurethane swivel caster with lock, Harbor Freight Tools
- 2 keg kegerator kit with dual regulator, 5# CO2 tank, hoses w. disconnects, Kegconnection's Ebay store
- 4-way CO2 gas distribution manifold, HomeBrewStuff.com
- 2-way CO2 gas distribution manifold, HomeBrewStuff.com
- Love Temperature controller, TSX-10140, Dwyer Instruments, Inc.
- Masscool 120mm computer fan, MP3SuperStore on Ebay
- Perlick Perl Forward Sealing Faucet (525SS), Austin Homebrew Supply
- 3" stainless steel beer shanks, brauman59 on Ebay
- Starr bottle opener "Home Brewed" with clear bottle cap catcher, Kegconnection's Ebay store
- 19.25" Stainless steel drip tray, Ebay
- 1.5" Rigid foamboard panels, Home Depot
- PL300 Foamboard adhesive, Home Depot
