• Home
  • Hops
    • DIY Projects
    • Dry Hop
    • Grow Hops
    • Videos
  • Grain
    • DIY Projects
    • Dog Treats!
    • Toasted Oats
    • Weigh And Mill Grain
    • Videos
  • Yeast
    • DIY Projects
    • The Life Cycle of Yeast
    • Harvesting, Rinsing and Re-Pitching
    • Videos
  • Water
    • DIY Projects
    • Ward Labs Water Report
  • Process
    • Brewing Guides
  • Equipment
    • DIY Projects
    • Homebrewer's Guide to Plastics
    • Store Hops And Specialty Grains
    • Organize Keg Supplies
  • Polls
  • Lists
  • Charts
  • Creative
  • Favorite Things
  • Coming Soon
  • Contact Us
  • Home
  • Hops
    • DIY Projects
    • Dry Hop
    • Grow Hops
    • Videos
  • Grain
    • DIY Projects
    • Dog Treats!
    • Toasted Oats
    • Weigh And Mill Grain
    • Videos
  • Yeast
    • DIY Projects
    • The Life Cycle of Yeast
    • Harvesting, Rinsing and Re-Pitching
    • Videos
  • Water
    • DIY Projects
    • Ward Labs Water Report
  • Process
    • Brewing Guides
  • Equipment
    • DIY Projects
    • Homebrewer's Guide to Plastics
    • Store Hops And Specialty Grains
    • Organize Keg Supplies
  • Polls
  • Lists
  • Charts
  • Creative
  • Favorite Things
  • Coming Soon
  • Contact Us
   BrewGeeks

Sniffing Airlocks since 2010

Automatic Line Cleaner - by LewyBrewing

Picture
The joy of kegging is a big step in a homebrewers life. But once you have the kegs you realize that you still have to clean the kegs to keep the beer tasting great. With some cheap supplies from Lowes you can accomplish this with ease.

Here is the parts list:
  • A cheap aquarium pump about $16.00
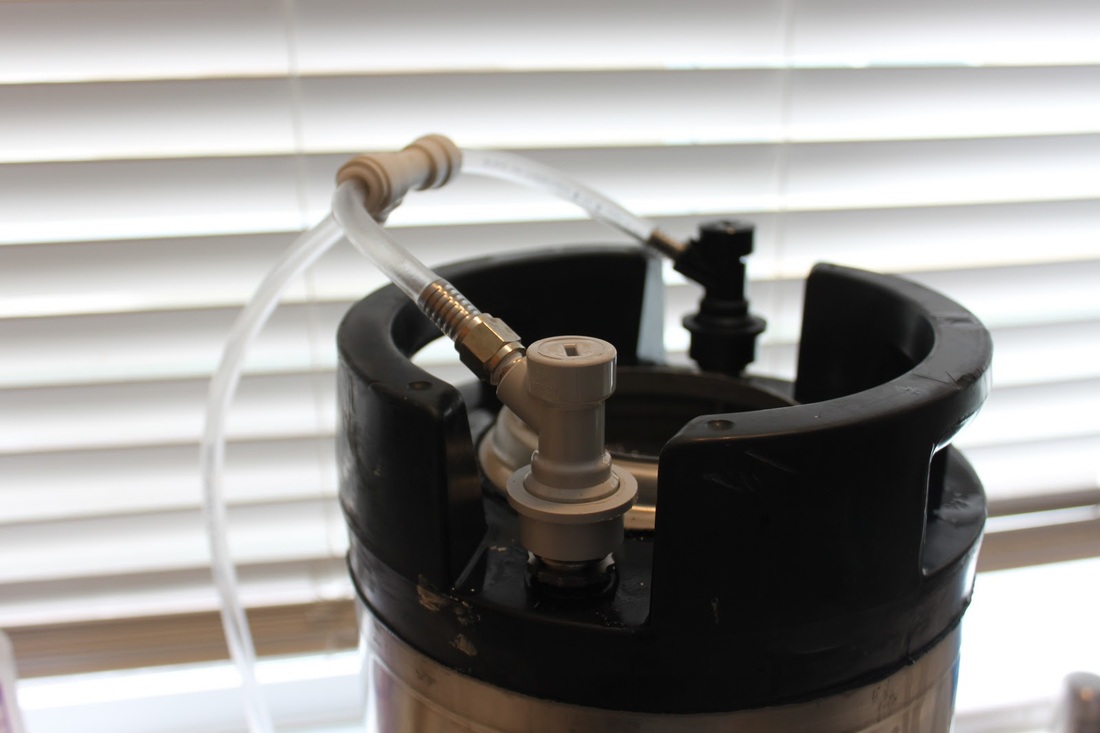
  • Corny keg liquid "Out" about $5.00
  • Corny keg gas "In" about $5.00
  • Clear plastic tubing that will fit on your "pop-its"  .50 a foot at Lowes
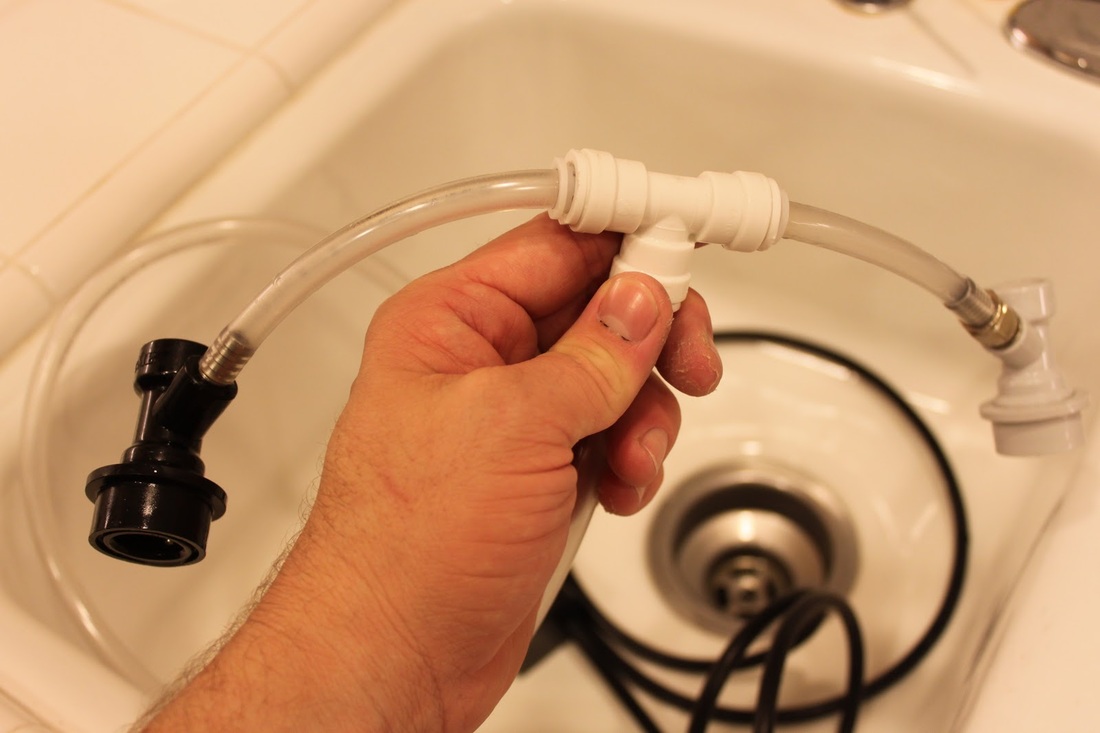
  • One T valve about $3.00

Picture
Picture
Picture
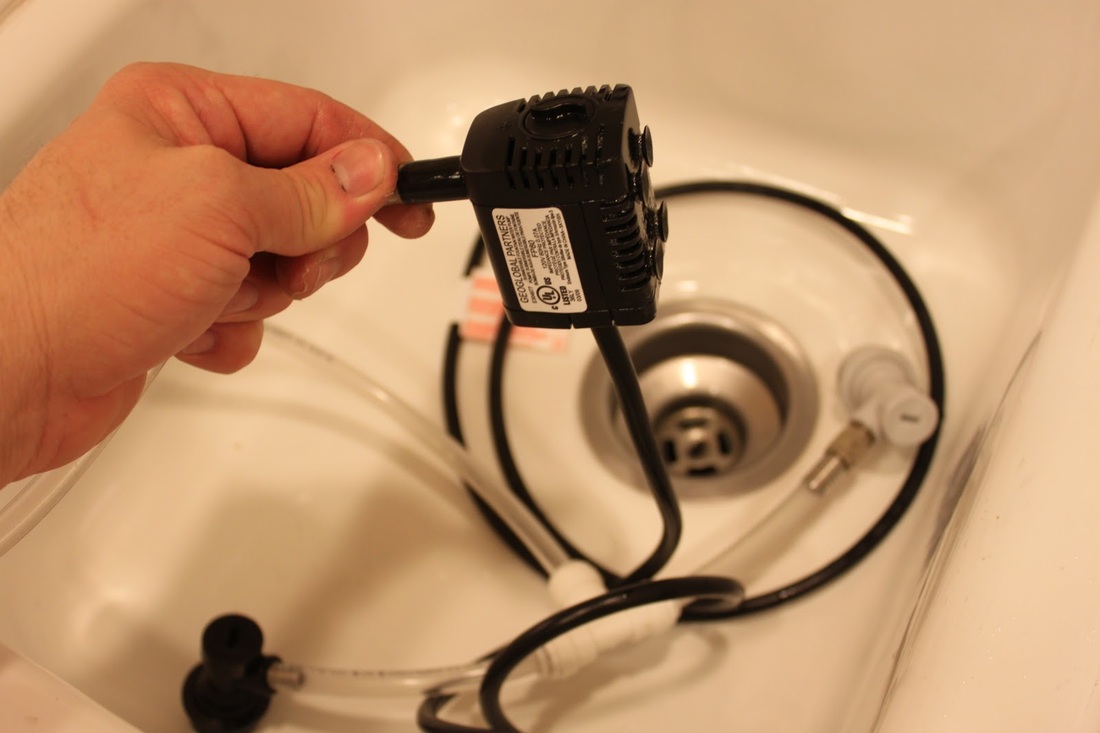
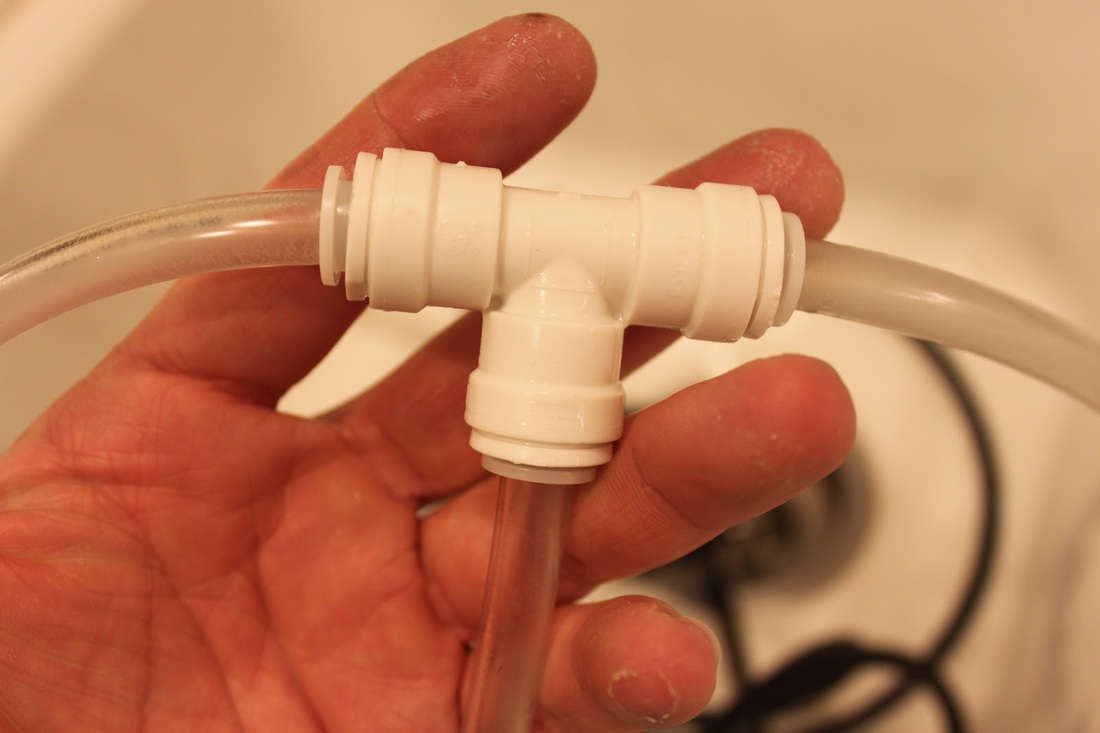
The pictures should give you a clear idea of how it goes together.  But you size the "pop-it's" so that they fit on the keg and cut the top part of the "T", then attach the T splitter. From that point size it down to the bottom of the keg and attach the pump (I had to heat up the tubing so that it would fit on the attachment).  And you are ready to go.

Once the cleaner is assembled, you are ready to clean.
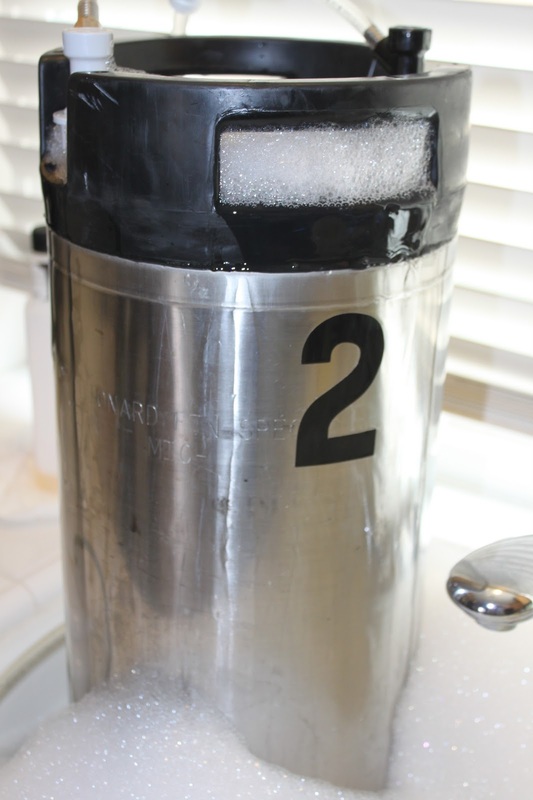
  • Plug the drain in your sink
  • Fill the keg 1/2 way with the cleaner of your choice.
  • Fill the sink with the keg inside of it with the same cleaner.
  • Plug the out and in on the keg
  • Put the pump inside the sink and turn on.
The pump will fill the keg and let it overflow into the sink.  This will create a recirculatory effect.

Here are some "Action" Shots: 
Picture
Picture
Picture
[Original Thread]
[Back To Blog]
Powered by Create your own unique website with customizable templates.