Beers and Beards BIAB Rig
My name is Megan, a self-proclaimed beer connoisseur who lives in a tiny town in northeast Massachusetts. A few months before Christmas 2014, I started searching the internet in hopes to find the perfect gift for my boyfriend, who, at the time, was an amateur brewer. He really got into brewing after I bought him a home-brewing starter kit for his birthday in the spring of 2014. I remembered him talking one day about wanting to invest in an outdoor BIAB rig that had a burner, a propane tank and a pulley system to pull up those heavy bags of soaked grain. At the time, I worked in a high school that had an amazing vocational/tech program (Carpentry, Automobile), and figured that, with the help of some people, I could build him the rig for Christmas.
After a few days of searching, I came across the “BrewGeeks” homepage and messaged Tom to see if he could help me get started after seeing his own rendition of a BIAB rig that he had made. It was about a 3 ½ month-long process that took a lot of corresponding back and forth with Tom, but it was SO worth the time, money, and a few bumps in the road to see my boyfriends face on Christmas. The end result turned out perfectly. I/We could not have been more pleased with it.
Here is a little step-by-step of the project.
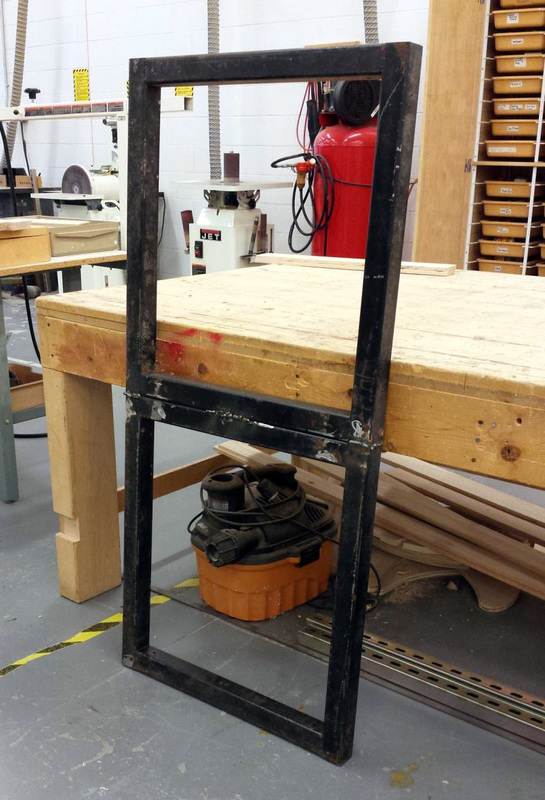
I visited a local scrap metal lot to see if I could save myself some money, and ended up finding two big square-shaped tube steel rods, go figure.
I hauled them back to the school’s carpentry shop to see if I could weld the two of them together to make the top of the rig where the table and burner would be placed.
I hauled them back to the school’s carpentry shop to see if I could weld the two of them together to make the top of the rig where the table and burner would be placed.

After the squares were welded together, I was able to sift through the Automobile shop to see if they had any scrap I could use for the legs. Luckily, they had 2 long metal rails that I was able to saw in half to make four equal-length legs for the top of the rig to rest on. I was able to weld them right to the square-shaped tube steel rods that I had found earlier.

|
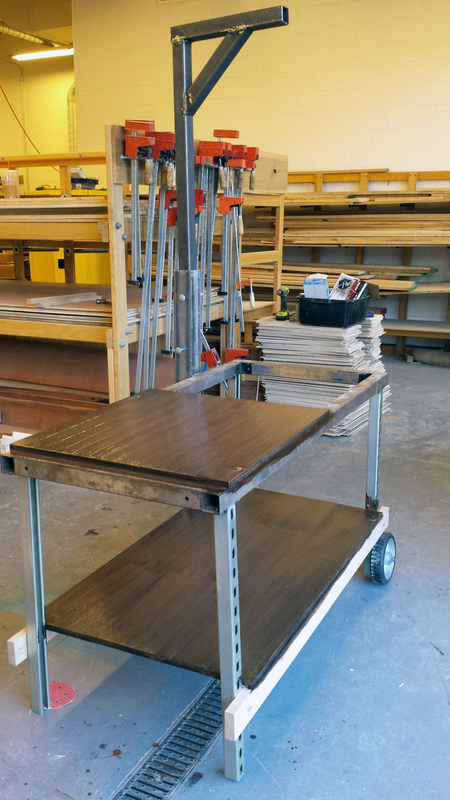
In the meantime, I went to a hardware store to buy some wheels so the rig could be tilted on its side and dragged around for easy transportation. They were bolted and screwed right into the legs of the rig. I also purchased a hand winch with a pulley, and a Bayou classic burner. I still needed to search for some more tube steel so I could attach the hand winch, pulley and burner before I could do anything else. I was getting a bit pressed for time, so I headed to another local scrap metal shop to see what they had. They didn’t have much to choose from, but I was able to get my hands on a thinner tube steel rod and a very wide, hollow tube steel rod. These two items became the masthead. I welded the wider tube steel to the back of the square-shaped tube steel used for the burner, and the thinner tube steel rested perfectly inside the wider tube steel rod. We drilled some holes into both of these tubes so two screws could hold up the masthead once it was hoisted. To put it back into resting position, we just took the screws out. Not ideal, but it worked.
Here is the rig with the masthead in resting position and another when it is hoisted (it measured 6 ft 6 in from the ground). |

Tacking the burner was a little tricky. I was able to use some very thin, flat steel rods from the Auto shop. I sawed four equal sized pieces and had a few students bend them with a vice so they could hold the burner up. The ends of the flat steel rods were welded inside of the square-shaped tube steel. It looked a little messy, but nothing some high-heat resistant paint couldn’t cover up. The other square-shaped tube steel was used for a “table” so my boyfriend could put things on it (grain, hop packets, refractometer, etc). I used some ¼” plywood for the top, stained and polyurethaned it. The same kind of wood was put on the bottom for the propane tank to rest on.
Merry Christmas! Here is my boyfriend using his rig for the very first time. We had just returned from a trip to Home Depot to buy a filled propane tank. Little did we know, we were about to embark on what I refer to as “The Brew Day from Hell”.

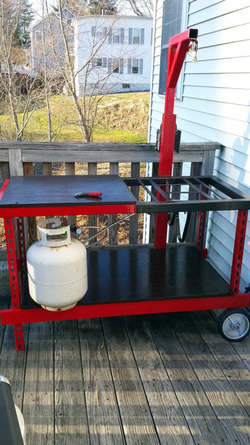
When we started, we noticed that the burner was giving off a very yellow-colored flame…no blue flame whatsoever (you can see the flame in the picture above). It was burning silently, too, which didn’t seem right to me because when I had searched for Bayou classic burners, I watched some YouTube videos of them being used and they were pretty loud. We kinda shrugged our shoulders and continued to brew. Oh, boy. The flame ended up completely covering the bottom of my boyfriend’s kettle with a nice, thick layer of soot. He had to carry the kettle upstairs to the kitchen to use his wort chiller, too because we couldn’t find a food grade hose to transfer water (out of season – it was December). So, naturally, soot got EVERYWHERE. The flame was so strong that we thought it actually burned the beer. The wort gave off a burnt sugar smell – not good. We did our research the next day and realized that we didn’t have the correct orifice or regulator for the burner. We ended up purchasing the correct kind for the Bayou classic burner, which gave us that nice, loud blue flame we didn’t get the first time.
All was well and all has BEEN well ever since. Happy brewing!
Cheers,
Megan
All was well and all has BEEN well ever since. Happy brewing!
Cheers,
Megan
