Bottle Washer - by MalFet

I like bottling. I tend to keep several dozen different kinds of beer on hand, and a kegerator of any size would need to pay rent if it wanted to live in my very small New York City apartment.
The only part of bottling that I find at all time consuming or tedious is washing the bottles.
No longer!
The only part of bottling that I find at all time consuming or tedious is washing the bottles.
No longer!
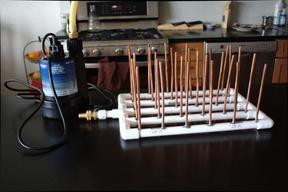
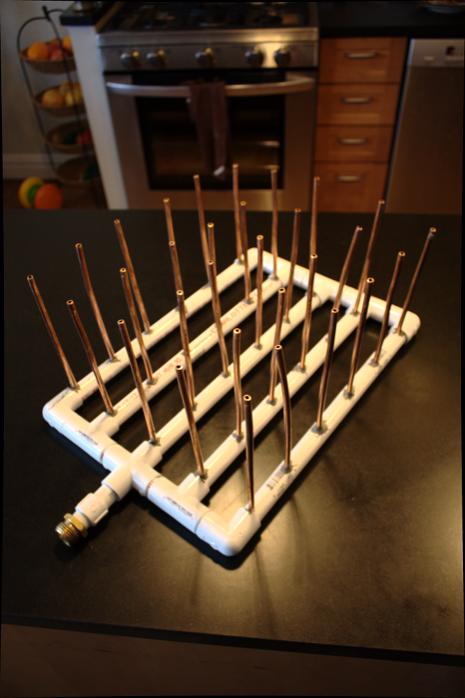
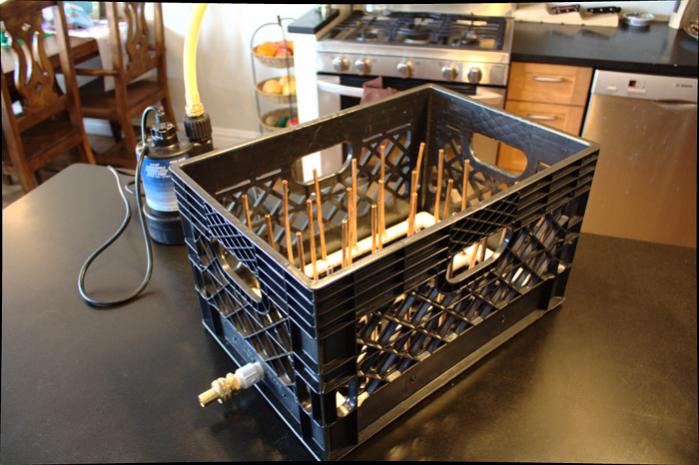
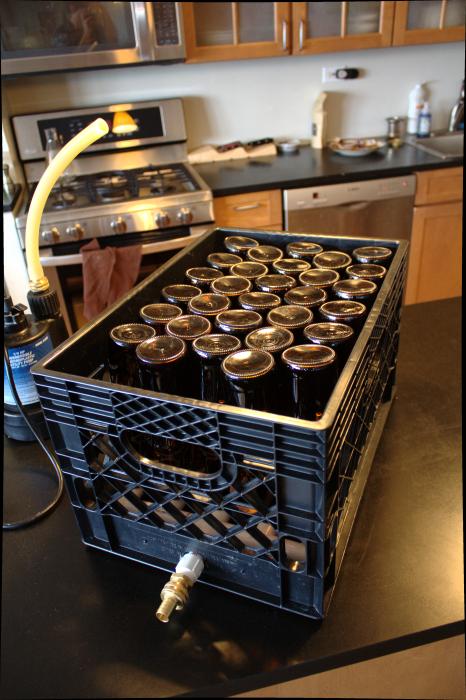
It's a very simple concept, but it can wash, rinse, and sanitize 30 bottles with virtually no effort. I built a frame out of 1/2" cpvc fit to a standard rectangular milk crate, used 1/4" copper refrigerator coil for the vertical bottle spouts, and push water through it with a 1/4 HP submersible pump. The pump sits in my sink filled with whatever I want to wash with (pbw->rinse water->star san), and the milk crate rests right on top of it.
I made three of them since I always bottle two ~4.5 gallon batches at a time, and washing those 90 bottles is now trivial. I fill the sink with PBW, let it run on each crate for 5-10 minutes, drain the sink, fill the sink with star-san, and then run it again for a minute or two. My active time for 90 bottles is probably somewhere in the neighborhood of 5 minutes. It's so painfully easy that I kind of hate myself for only doing this now after all these years.
I get plenty of power from this pump, and without the bottles to block it the stream of water coming out extends 3-4 feet above the spouts. I ran through a batch of very grimy, dried out bottles and they came out completely clean after 15min of PBW. If I built it again, I might actually use copper for the frame and sweat it all together. The JB Weld holds reasonably well, but in knocking the washer around a bit a few have come loose. They still work perfectly fine even when loose, but welded metal would obviously be more durable over the long run.
One major caveat: I have only tested this on 12oz longneck bottles (Sam Adams type). I don't have any of the shorter, fatter bottles (Sierra Nevada type) to try with. I suspect they might not fit.
It's a pretty self-explanatory build. Parts and steps are as follows:
Parts
pump and connector
1@$47.99 - 1/4 hp submersible pump (http://www.amazon.com/Superior-Pump-91250-Thermoplastic-Submersible/dp/B000X05G1A/. I strongly recommend this pump or its 1/3 hp cousin. If you get something else, I can't promise that it will work. At the very least, make sure you get a pump capable of at least 25 feet of head pressure.)
2@$3.19 - barbed to female garden hose adapter (http://www.amazon.com/dp/B006PKMU7U/)
1ft@$2/ft - 1/2" silicone hose
2@$0.20 - 1/2" worm clamps
1@$1 - 1/2" threaded to male garden hose adapter
1@$1 - 1/2" cpvc straight female to threaded male adapter
1@$0.20 - 3" of 1/2" cpvc pipe
__________
TOTAL: about $59
Washer
1@$6.50 - rectangular milk crate (http://www.milkcratesdirect.com)
1@$22.49 - 1/4" refrigerator copper tubing (for example: http://www.amazon.com/X20-O-D-REFRIGERATOR-COPPER-TUBING/dp/B002FYAI42/. There appears to be significant variation in wall thickness among different types of copper tubing, and to get a good spray height you need a relatively small inner-diameter. If you get the relatively larger stuff, you should be able to pinch the ends of the tubes to get better results.)
4@$0.40 - 1/2" cpvc elbow (straight)
5@$0.40 - 1/2" cpvc tee (stright)
1@$0.80 - 1/2" cpvc cross (stright)
1@$3 - 10' length of 1/2" cpvc pipe
__________
TOTAL: about $36
Tools
- Hand drill with 1/4" bit
- JB Weld
- Something to cut cpvc pipe and refrigerator coil (a simple cheap-o $20 rotary pipe cutter does the job handily)
- Something to drill a 3/4" hole in the side of the milk crate (I used a cheap step-bit)
Instructions
1) Cut five 14" lengths from the CPVC pipe. These are your traversals.
2) Cut eight 1" lengths from the CPVC pipe. These will attach your elbows, tees, and cross together. They should be just long enough to join your joints without space between them.
3) Assemble the two ends of the frame like in the picture below. One edge is composed (elbow-tee-tee-tee-elbow), and the other (elbow-tee-cross-tee-elbow).
4) Join the two ends together with your five 14" traversals. Make sure this assembled frame fits into the milk crate.
5) On each traversal, drill six evenly spaced 1/4" holes, pointing straight up. The first and the last should be right up against the joint caps. Test the first hole with a small piece of copper coil to make sure it fits. It should be a snug fit, but if not you can pinch the end a bit with a pair of pliers.
6) Cut thirty 7" lengths of refrigerator coil.
7) Slip the lengths of copper into the drilled holes, and use the JB Weld to seal the joint between the CPVC and the copper. Let bond set overnight.
9) Drill a 3/4" hole into the lower side of the milk crate right where the cross open end of the cross joint is. This cross joint should be the only open part of the frame.
10) Assemble the connector (3" cpvc pipe -> 1/2" cpvc straight female to threaded male adapter -> 1/2" threaded to male garden hose adapter)
11) The connector should be able to pass through the hole in the side of the milk crate to attach to the frame inside, and the silicone hose with the garden hose adapters should connect this up to the pump.
12) Plug it all together and let 'er rip!


