Build a Fermentation Chamber
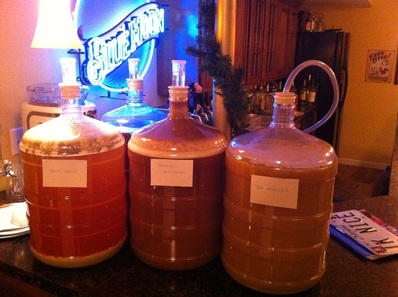
The basic idea of a fermentation chamber is to control the temperature of yeast while they are active. This is not to say that excellent beer can't be brewed without one, but in my case, I was limited to the ambient temperature of the basement, which is quite different in the month of January than it is in August.
Why temperature control? It offers the ability to produce consistent beer year round while also targeting certain esters when higher temps are required. There are many different ways you can make one, some being more complicated than others, but I'll outline the basic idea so you can come up with a design that meets your budget and requirements.
At a minimum, you need an insulated box with a method of cooling itself that is large enough to hold a carboy (or a few). A great, inexpensive way to accomplish this is by making a chamber that uses trays of ice (or frozen 2-liter bottles) to establish a base temp which rises slowly as the ice melts. A fan is usually added to keep the ambient temp around the beer consistent. Any inexpensive thermometer can be used to measure the temperature inside.
Measuring Temperature
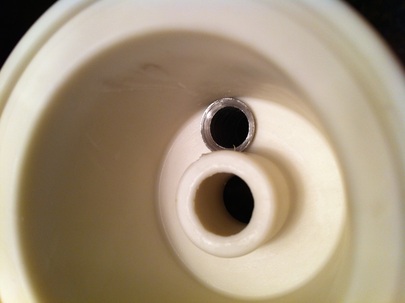
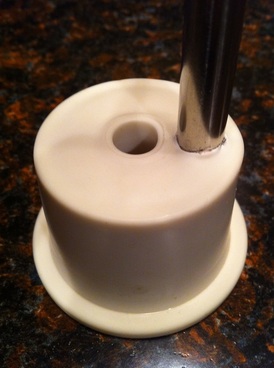
The next step toward improving temperature accuracy is to put a thermometer in the beer itself. WHAT?? Well, not IN the beer, but in a stainless steel tube that is in the beer. Search for thermowell to find different versions of this tube.
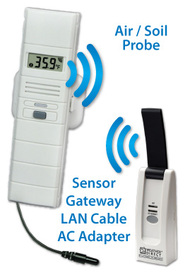
To monitor temperature, we found a great wireless thermometer setup by a company called Weather Direct that sells for about $90 for the base unit and one probe. Each additional probe is about $45 and records two different temps, one for the 6ft (1.8m) probe and another at the unit itself. This is useful to display the temperature of the beer as well as the ambient temp of the chamber. I've found that active yeast tend to raise the temperature around 4-5 degrees.
There's no fee for the basic service and it outputs all figures to a webpage that can be viewed from anywhere. Here's ours.
Building a Chamber
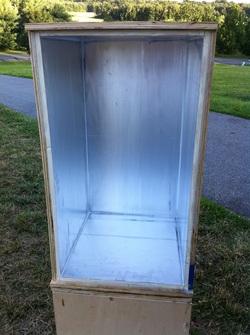
Our chambers were built with 3/4" (18mm) plywood and 1/2" (12.7mm) firm insulation. Edges and corners are sealed with caulk.
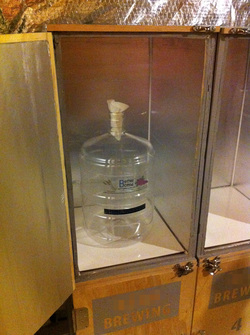
Here's a 6 gallon (22.7 L) better bottle for some perspective on the size of each chamber. Because our method of cooling will use water-cooled computer fans, we need to leave some space up top to mount them.
Notice the shiny white dry erase board material at the bottom of each chamber. This disburses the weight of a full carboy to prevent damaging the insulation and also helps clean up if something is spilled. It's also nice to write notes on about the beer being fermented!
Notice the shiny white dry erase board material at the bottom of each chamber. This disburses the weight of a full carboy to prevent damaging the insulation and also helps clean up if something is spilled. It's also nice to write notes on about the beer being fermented!
Chamber Stand
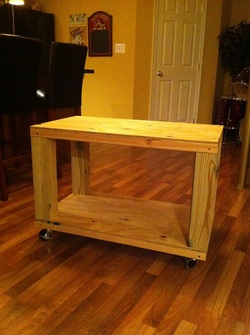
Racking beer to a keg always works better when the carboy is elevated so we need to get these chambers off the floor. Here's our stand made from 2x4s, 4x4 posts, plywood, and wide casters. It should be able to support 20 gallons (76 L) plus the weight of the chambers no problem!
Computer Fan Cooling & Mini Freezer
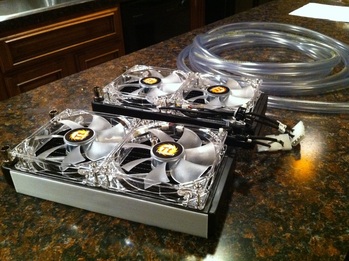
This was by far the most daunting part of the project because there was a lot of "well, it should work" as we discussed the options. The basic idea is to use water-cooled radiators with fans attached that turn on and off based on the temperature of the beer.
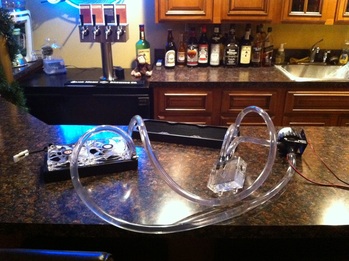
Distilled water is continuously pumped through a loop that has a larger radiator and 20 (6m) more feet of tubing at the other end which is stored in a chest freezer. Water is added at the top of the loop through a reservoir.
A coil of silver goes in the reservoir to prevent algae from forming and keeps the water clean.
A heat exchange takes place between the chambers and the freezer. The larger and more powerful the freezer, the lower it will be able to drop the chamber temps. I was shooting to lager in these, but with four chambers, this little freezer can't quite cut it. We can, however, start ales at 65F degrees (15.6C) and ramp up to 70F (21.1C) over the course of a week.
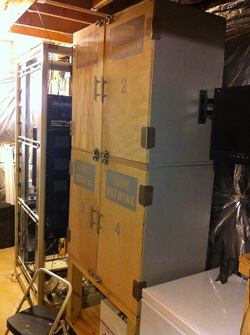
Wiring The Beast
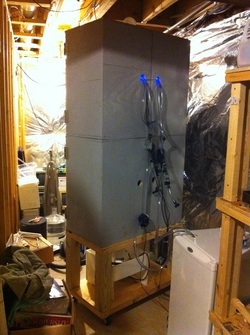
A hole saw was used to cut an entry/exit hole on the back of each chamber. Remember that any place in the box that is not completely sealed affects how low of a temperature can be reached.
There are actually two pumps, one on each end of the loop, which should remove some stress on each one as well as keep us in business if a pump dies.
You'll want to wrap all water lines with foam to keep them well insulated.
There are actually two pumps, one on each end of the loop, which should remove some stress on each one as well as keep us in business if a pump dies.
You'll want to wrap all water lines with foam to keep them well insulated.
|
UPDATE: I began this project using a large radiator in the freezer which essentially "closed the loop". After a few years and two or three failed small pumps later ($80 a piece), I decided to try something new.
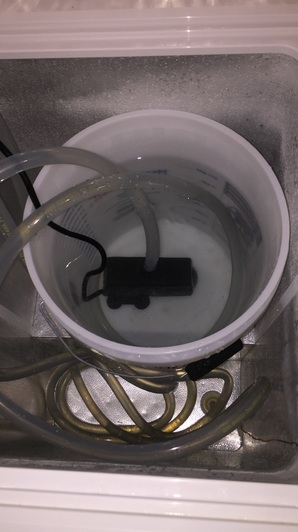
I've switched to a large bucket with a submersible aquarium pump and the output hose simply lays in the bottom of the bucket. These aquarium pumps are not expensive (around $30) and come with a few different sized hose connects which work perfectly. This approach is much better and even dropped the chambers a few more degrees! |
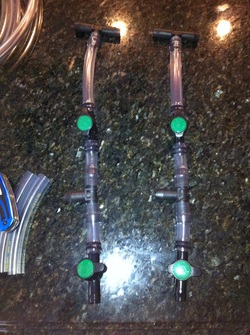
All tubing is 1/2 inch (1.27cm) and we ordered tee joints and shut-off valves from an irrigation supply store. The thought is by adding valves, that the top or bottom two chambers can be turned off temporarily while the others are fermenting, thus allowing for lower temps if necessary.
It's Alive!!
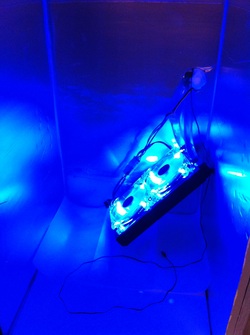
Ain't it purty, all lit up with blue LEDs...which at first, I was worried would do something to the yeast, but we have since fermented plenty of batches and it's fine.
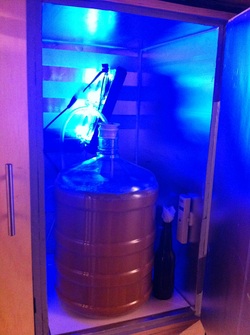
The fan is mounted at an angle so air blows down around the carboy. Three strips of heavy-duty velcro hold the radiator to the back wall of the chamber.
The temperature probe is mounted at beer level to get an accurate measurement of the ambient temp and the wire probe goes down into the thermowell.
The temperature probe is mounted at beer level to get an accurate measurement of the ambient temp and the wire probe goes down into the thermowell.
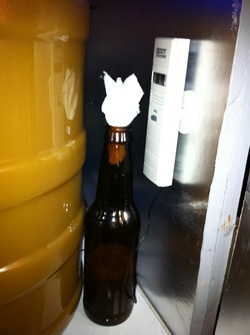
A bottle containing the sample we took after the yeast was pitched is stored next to the carboy in case we need to take readings along the way. It's nice to have it fermenting at the same temperature.
A Bright Idea!
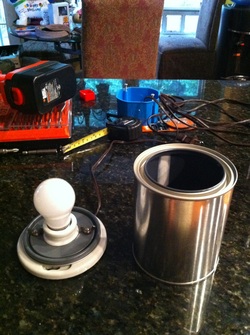
With a method of cooling the chambers under control, next we need to figure out how to raise the temperature.
A great way to do this is to use an incandescent light bulb, but the research I've done says this is not a great idea. Whether it's true or not, a pint-sized paint makes an excellent cover to shield the light. All that is needed is to drill the lid with a hole saw and attach the porcelain lamp holder with wingnuts.
A great way to do this is to use an incandescent light bulb, but the research I've done says this is not a great idea. Whether it's true or not, a pint-sized paint makes an excellent cover to shield the light. All that is needed is to drill the lid with a hole saw and attach the porcelain lamp holder with wingnuts.
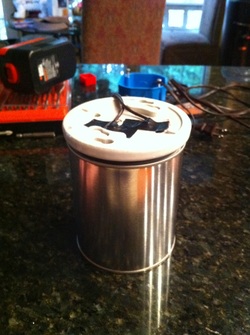
Flip it upside down and...
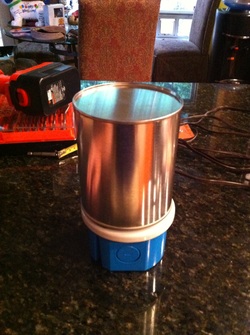
Voila! One heater, perfect for the back of the chamber.
Heater in Action
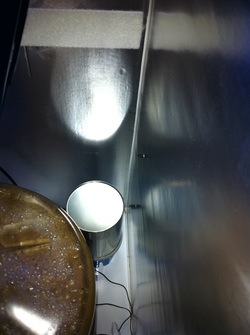
The paint can heater doesn't seem to affect the insulation at all but actually gets very hot to the touch and warms up the chamber very quickly.
Stoppers with Thermowells Attached
The Fermenator Web Page
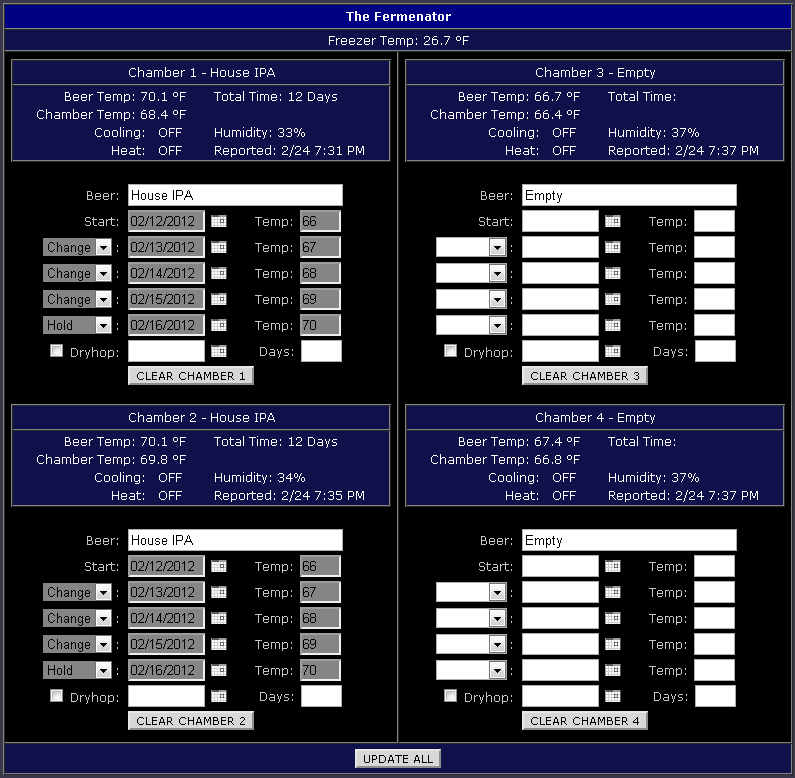
Now we need to come up with a way to monitor the temperature and toggle the fans and heaters on & off accordingly. To do this, we plugged each fan and heater into a module that can receive on and off commands. This technology is called X-10 and has been around for a very long time. It allows a computer to send commands through normal household wiring.
We wrote computer code that grabs information from the web page every minute and then compares the current schedule to each chamber to see if cold or heat should be applied. In the screenshot above, you can see both 5 gallons of house IPA started at 66F degrees (18.9C) and then turned gray as each point in the schedule was reached. They are currently holding steady at 70.1F degrees (21.2C). There is a .2-degree allowance.
We wrote computer code that grabs information from the web page every minute and then compares the current schedule to each chamber to see if cold or heat should be applied. In the screenshot above, you can see both 5 gallons of house IPA started at 66F degrees (18.9C) and then turned gray as each point in the schedule was reached. They are currently holding steady at 70.1F degrees (21.2C). There is a .2-degree allowance.
Add Cameras? Why Not!
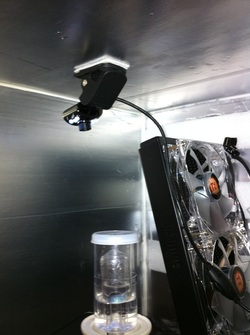
Because they're so cheap, we thought it would be cool to add a usb camera to each chamber for remote viewing. Mounted on the ceiling, this model has led lights that allow for viewing in complete darkness. At $4.66 per camera, I really wasn't sure what to expect, but the reviews online said it was decent so we gave it a try.
Bird's-Eye View of the Fermentation
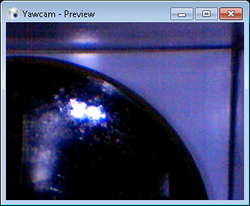
Here's a shot of what the camera sees. I like to keep it pointed so that part of the carboy as well as the blow-off container are in view (I have an air lock on this one).
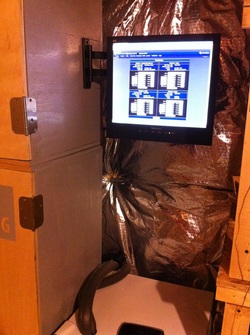
Fold Away Monitor
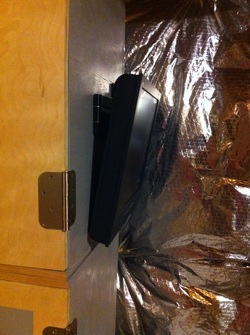
An old monitor mounted nicely to the side of chamber for viewing the schedule and cameras.
Well, we hope you liked reading about our fermentation chamber build and I'll be posting a list of parts shortly in case you would like to build one of your own.
Also, we've had a few requests for my code and logic behind the chamber and Fermentator page.
Linked below you'll find the script that is run every minute and also the asp page that I use as an interface for it. This should be a nice starting point to pull some of the logic to use in whatever setup you end up with. The script is vb.net code and I call the ProcessSchedule routine every minute.
| |||||||||||||
MeasurementsChamber
Hight: 31" (78.7cm) Width: 18" (45.7cm) Depth: 19" (48.3cm) These are outside dimensions for one chamber. Stand Hight: 25.5" (64.8cm) Width: 36" (91.4cm) Depth: 20" (50.8cm) We added an extra inch on the depth of the stand in case the back of the chambers needed shims. |
Parts ListTemperature Monitoring
We love these thermometers and this project would certainly not be possible without them. The wireless works perfectly from one end of the house to the other (I had one in my keezer and bright tank for a while) and they are very accurate from our testing. TX60U-SET-D Online Wireless Temperature Base and Probe TX60U-IT-D Each Additional Probe Thermowell Brewers hardware 16" (40.6cm) stainless thermowell Video Monitoring These are cheap cameras from China, so I can't vouch for their reliability, but mine have been working for 6 months with no problems. Camera USB PC Webcam (300K Pixel with 6-LED) USB Hub Power Bar Style USB 2.0 4-Port Hub (1-Meter Cable) Cooling Components I noticed some of the items are out of stock or discontinued since I bought them. You may need to look elsewhere. All tubing is 1/2 inch (1.27cm) (thick wall) and was purchased at our local homebrew store. Pump Swiftech MCP655 12 VDC Pump Liquid Cooling System Pump & Fans Power Cord (need 1 for each group of two fans) Dual Output AC/DC 12V/5V Power Adapter Type C, 4-Pin Molex Large Radiator Swiftech Triple Radiator Small Radiator Swiftech double radiator Radiator Posts (need 2 for each) Enzotech HF-G1/4-12 Water Cooling Accessory Cooling Fan (need 2 for each) Thermaltake AF0026 Smart Blue LED 120mm Fan with Speed control knob Reservoir Swiftech MCRES-Micro Hi-Flo Reservoir (SFF) - 3/8 & 1/2in Heating Components Coming Soon |
If you liked this guide, please have a look around at the rest of our site. We have written many articles on various homebrewing topics as well as showcased lots of DIY projects from around the web. Everything on the site can be found using the navigation menu at the top-left corner of the page.
Here are a few links to get you started:
Process
Equipment > DIY Projects
Cheers!
Here are a few links to get you started:
Process
Equipment > DIY Projects
Cheers!
