Counterflow Wort Chiller - by Cheyco
This is nothing ground shattering as far as CFC's go, but I think it's an improvment on the BYO design. There is a slight increase in cost, but I think it's easily offset by the increase in durability and ease of assembly (no JB weld).
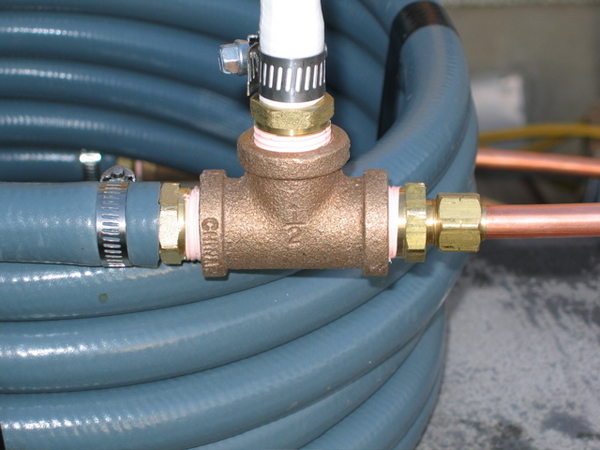
The difference is how the tees are built, where they used rigid copper tees I swapped them out for threaded tees and hose barbs instead.
The difference is how the tees are built, where they used rigid copper tees I swapped them out for threaded tees and hose barbs instead.
BOM:
25' 5/8" garden hose
25' 3/8"OD copper tubing
2- 1/2" NPT female brass tees
2- 3/8"compression x 1/2"male NPT fittings
4- 5/8"hose barb x 1/2" male NPT fittings
4- 5/8" Hose clamps
Tools:
Teflon tape
25/64" drill (you can use 3/8" but that extra 1/64" makes putting it together much easier)
Knuckle-busters (wrenches for the fittings)
Homebrew
- Start by cutting about 8" off both ends of the garden hose. Use your guile and get the copper tubing insde the garden hose, it's easier if you straighten both out first.
- Next drill out the centers of the compression fittings so the tubing will slide through them. Drill from the 1/2" threaded side to avoid damaging the ferrule seat.
- Once you're done that, put thread tape on all the threads and make it look like the picture (don't forget to put the hose clamps on the hoses before you put the barbs in the hoses!)
- Tighten everything until there are no leaks and you're done.

