Ultimate BIAB Rig - by itzkramer
This was my first endeavor with metal fabrication and I think it turned out pretty well. I’ll start with the parts list:
Frame: 60ft 2x2 .065 tube steel = $109.00
Sheet metal / all thread / steel bar = $10.00
Burner: Taken off my SQ-14 Bayou Classic = FREE
Hardware: Nuts, bolts, pop rivets = $30.00
Harbor Freight hand winch = 20.00
Pulleys = $10.00
Paint: Rust-Oleum Professional / High Temp paint = $25.00
Plywood = $20.00
Stain / Polyurethane = $20.00
Wheels = $10.00
March pump = $120.00
Stainless fittings = $80.00
TOTAL = $454.00
I also bought some tools along the way. The way I see it they are more of an investment than part of the total cost, but I’ll include them as well:
Harbor Freight 14” chop saw = $60.00
Harbor Freight 4.5” angle grinder = $20.00
Harbor Freight drill guide = $20.00
Harbor Freight welding gear (wire brush, 90 deg magnet, gloves, auto-darkening helmet) = $50.00
DeWalt 18v drill/driver = $99.00 (on sale at Lowes)
I’ll also list other tools that I already had, but are worth mentioning:
Flux-Core welder 115v
Levels, squares, tape measure, rulers
Tin snips
Pop-Rivet gun
Table saw
A nice set of high speed drill bits
Let's get started with the build!
Making The Frame
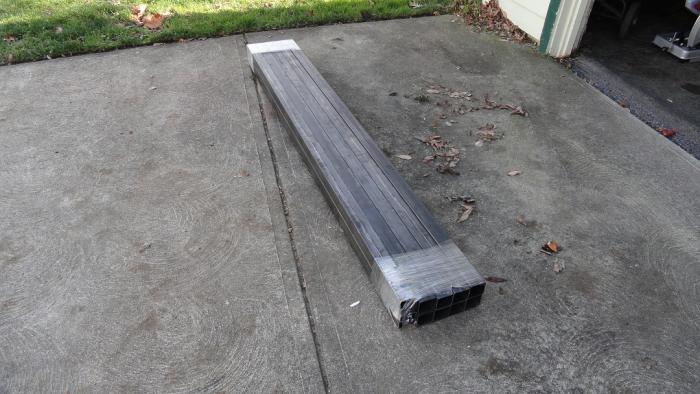
The tube steel. From Spee-D-Metals, 20 minutes east of Cleveland, OH.
|

Making the initial cuts on the Harbor Freight chop saw. I know it’s a cheap saw, but it worked well and I didn’t have any issues.
|

Instead of moving the saw guide round, I moved the steel with wood blocks. It helps to start on the corner of the steel.
|
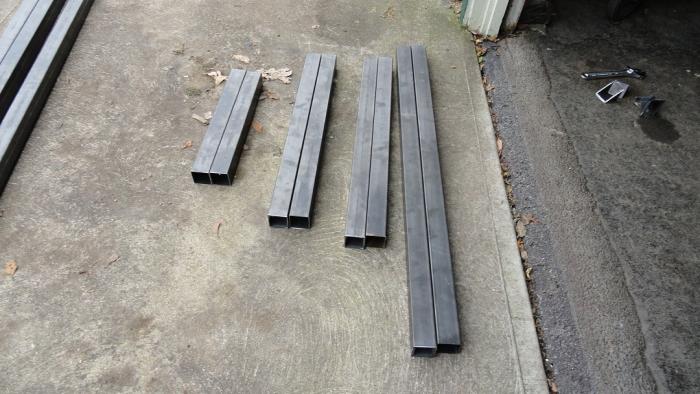
Various cuts for the frame.
|

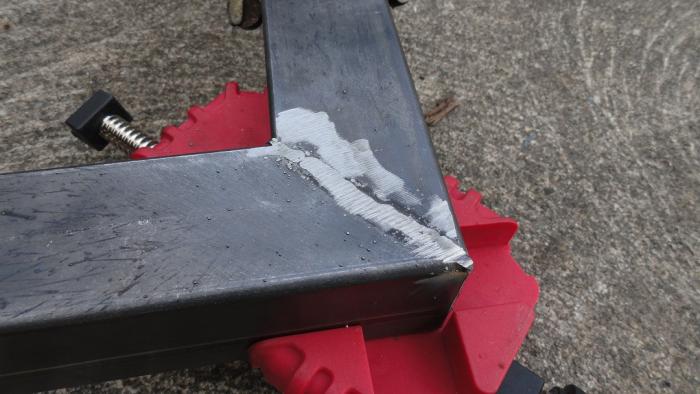
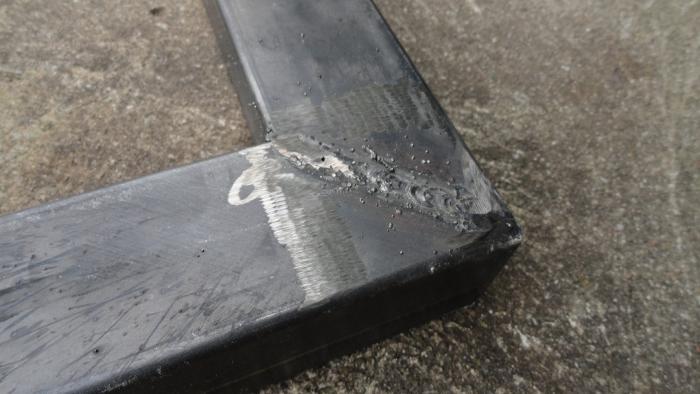
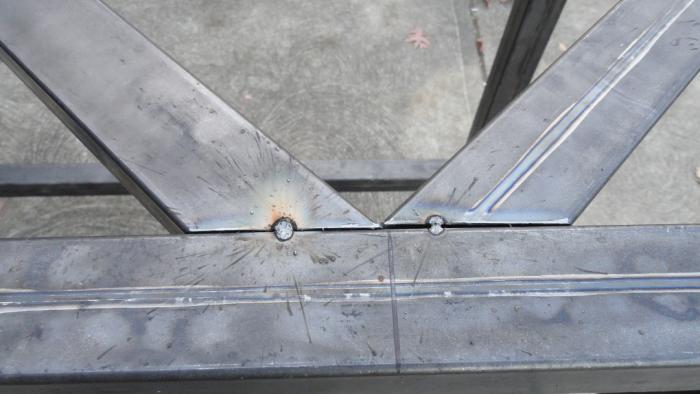
I bought this welder off a friend for $100 a while back. It gives off a lot of splatter, but worked ok. I did a lot of grinding due to the weld quality.

Welding up the top of the frame
|
|
Grinding down the corners so the vertical legs will sit flat.
|
|
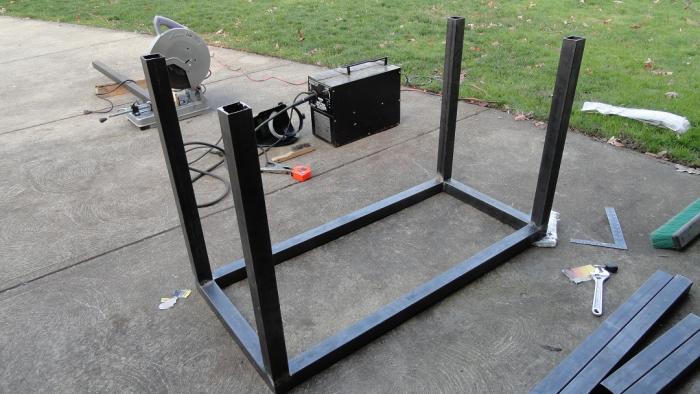
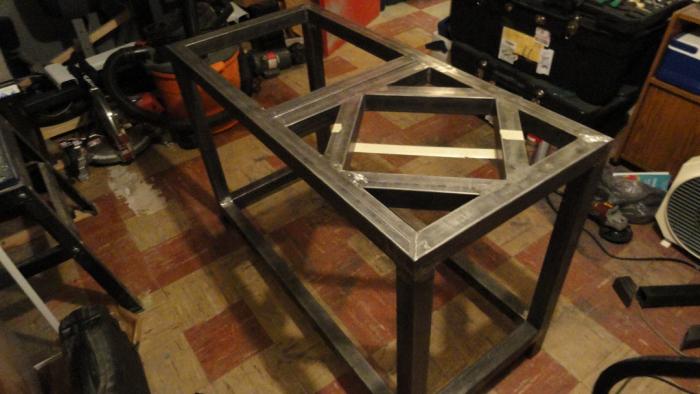
The frame coming together.
|

The welds are kind of crappy, but they served their purpose. I wish I had a nice MIG welder.
|
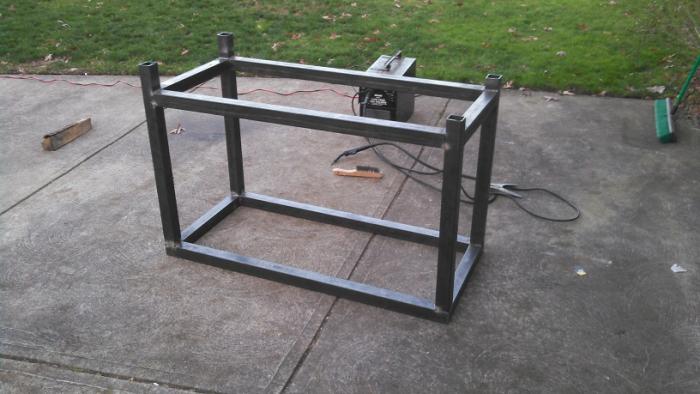
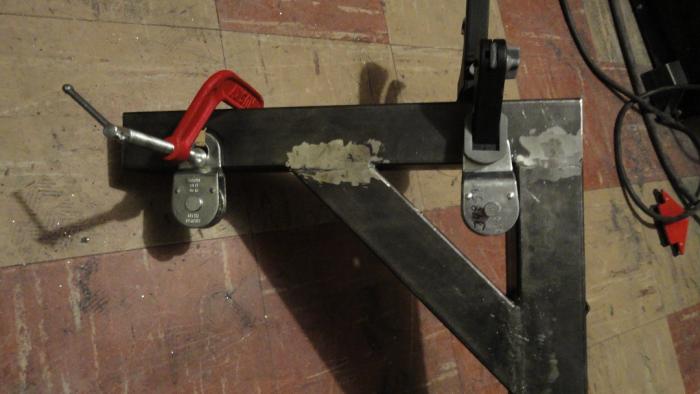
Tacking the pot supports in place.

The second bar on top will provide an air buffer to prevent the plywood work surface from burning.

I cleaned these up with the angle grinder.
|
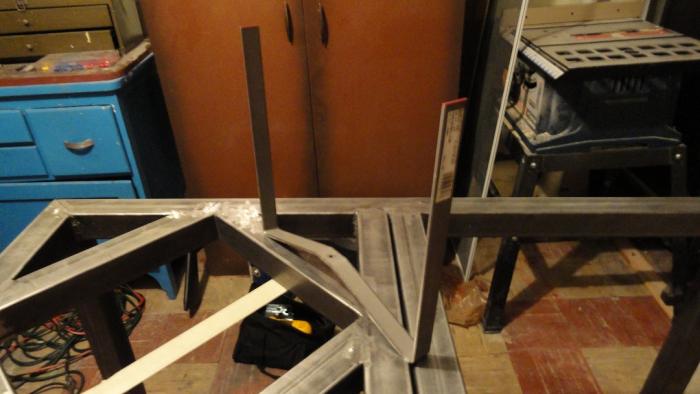
Using masking tape to center the burner placement and height.
|
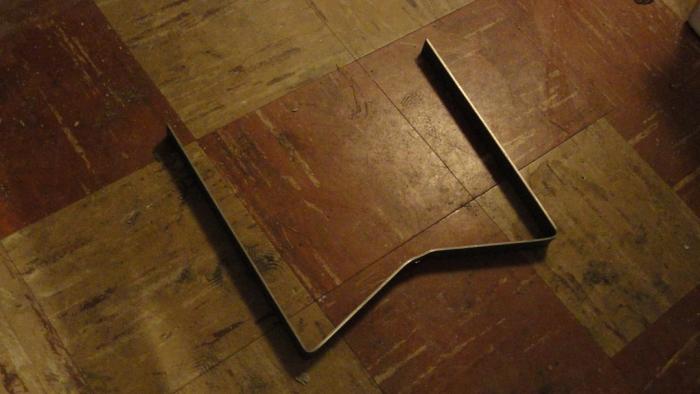
I made this burner support from 1” flat steel bar. I bent it by hand in a vice.
|
|
Install The Burner
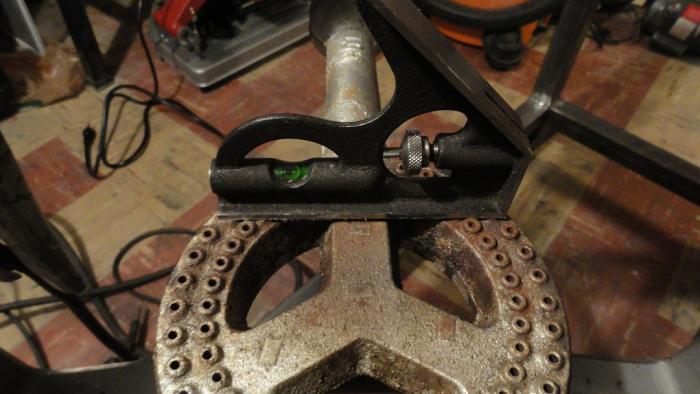
Using a level on the burner before I tack the support in place.
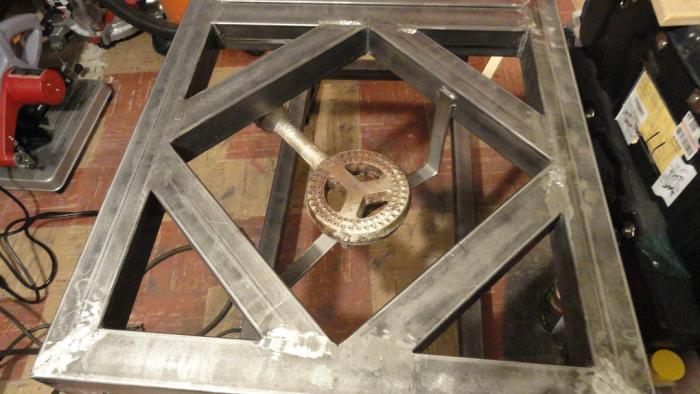
The mounted burner.
|
|
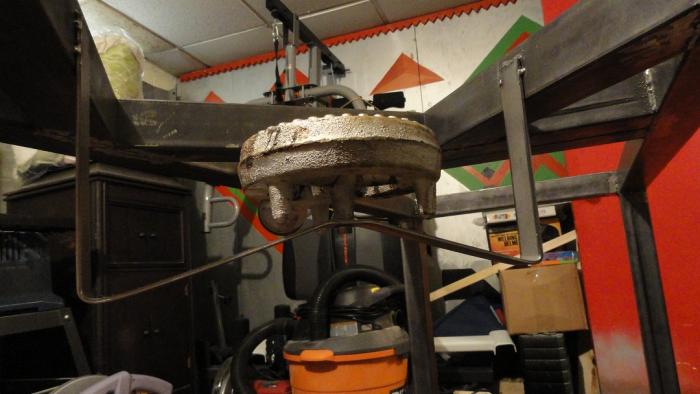
The Mast

|
|
The mast, which will raise and lower. It attaches with ½” bolts to the mast support. The pulleys have ½” washers seated behind them to give them space from the mast.
Prime & Paint

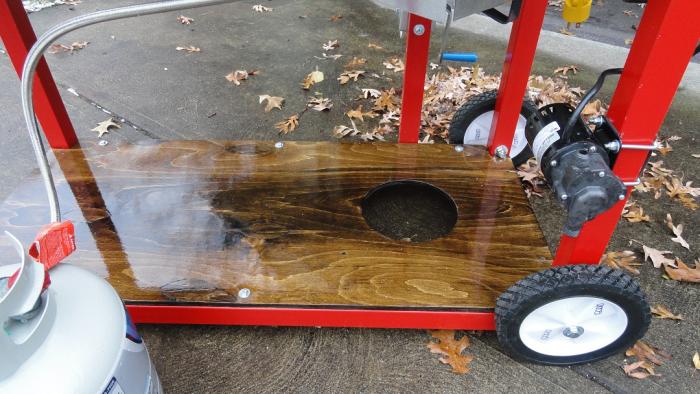
The frame painted. 1 can Rust-Oleum Pro primer, 2 cans Rust-Oleum Pro red, 1 can High-Temp black. The wheels are attached with ½” x 5” bolts.
|
|
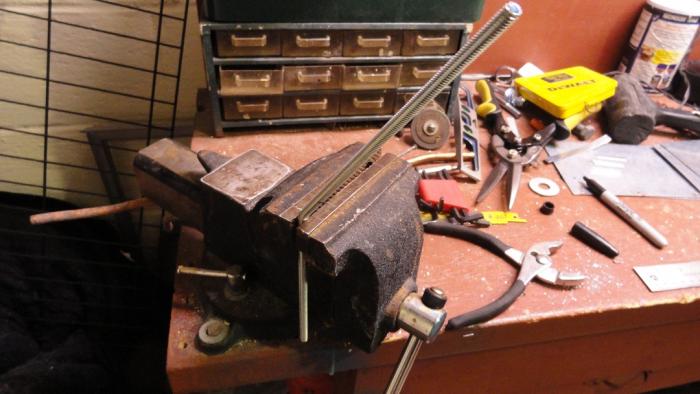
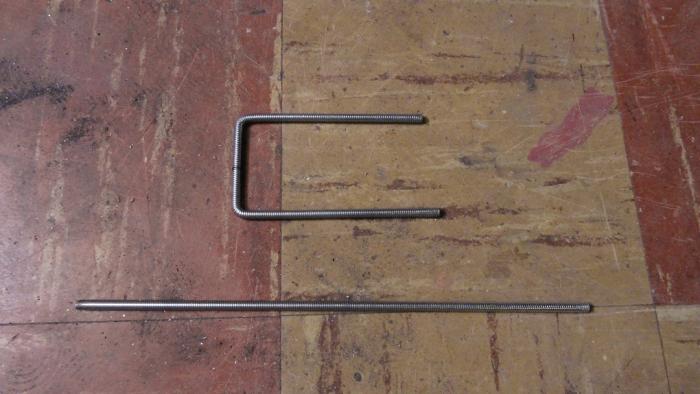
Bending all-thread in the vice for square brackets to mount the March pump. Bent by hand.
Mounting The Pump
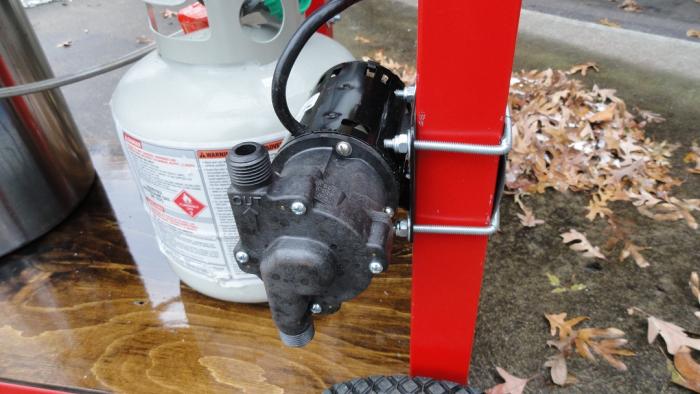
The pump mounted. I used some gasket making sheet between the frame and pump to damped vibration and help keep it in place.

|
I cut some ½” plywood up, stained it with Walnut, and topped it off with 2 coats of polyurethane. Sorry, no pictures.
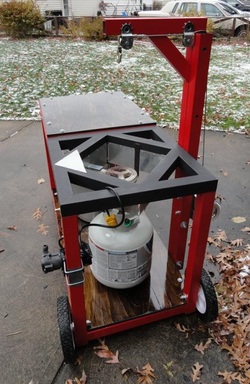
All done! Here you can see (left) the rig in the storage position. Notice the sheet metal wind screen and heat shield for the ball valve and sight glass. The sheet metal is zinc plated. 
The hand crank. I placed a piece of ¾” foam between it and the frame to dampen vibration and noise.
|
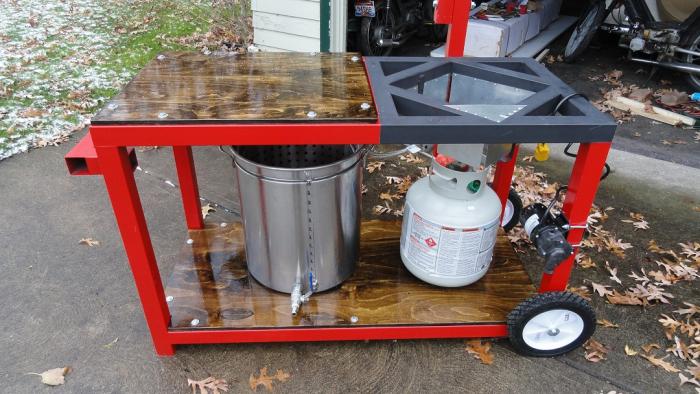
Finished Pictures

|
|

|

|
|

|
I cut an 8” hole in the bottom shelf to accommodate the propane tank and keep it from rocking or falling over when moving the stand.
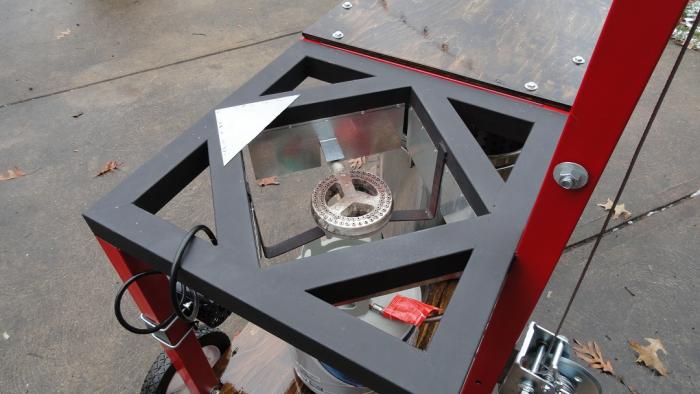
A close up of the burner area. I tempered the paint by starting at low temp and slowly raising it over a period of 30 minutes. It seemed to work pretty well.
Well, that’s it folks. I hope you liked the build. I still have to add some stainless fittings and silicone tubing, but I’ll knock that out next brew day.
Well, that’s it folks. I hope you liked the build. I still have to add some stainless fittings and silicone tubing, but I’ll knock that out next brew day.
