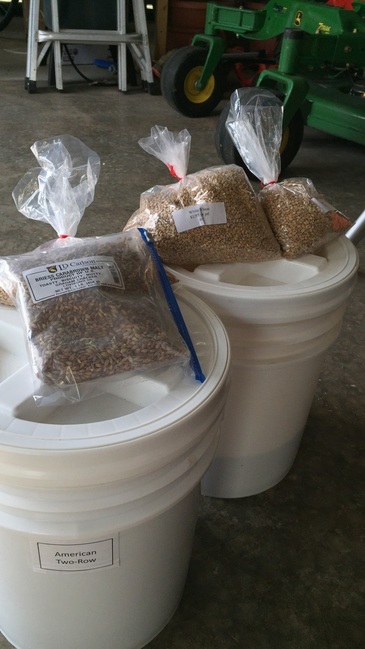
I brewed a wheat ale today and it's a little different than my house recipe that calls for flaked wheat. Instead, I used 5lbs of white wheat malt and also the Saf-06 wheat ale yeast to add some additional wheat character. Another twist is the addition of Briess Carabrown Malt which is a specialty grain that scoundrel and I discovered in our LHBS. As soon as we smelled it, we both said DAAAMN!! It's described as toasty, buscuity, nutty, and graham cracker. You're probably thinking this sounds like a perfect grain to put in a porter or strong ale but idono, I'm adding it to this wheat beer. I'll ferment pretty low, probably around 62 degrees to be as clean as possible, and I'm hoping the carabrown will add something that is not typically found in a traditional wheat ale.
Hybrid Wheat AleAmerican Wheat or Rye Beer (6 D)
Type: All Grain
Batch Size: 11.00 gal Boil Size: 13.46 gal Boil Time: 60 min End of Boil Vol: 11.96 gal Final Bottling Vol: 10.42 gal Fermentation: Ale, Single Stage
Date: 13 Jun 2015
Brewer: tknice Asst Brewer: Pleepleus Equipment: Pot (15 Gal Boilermaker) - BIAB Efficiency: 70.00 % Est Mash Efficiency: 73.2 % Taste Rating: 35.0
Taste Notes: New recipe, excited to check out difference with carabrown malt and saf-06
Gravity, Alcohol Content and Color
Est Original Gravity: 1.054 SG
Est Final Gravity: 1.016 SG Estimated Alcohol by Vol: 5.0 % Bitterness: 25.7 IBUs Est Color: 5.4 SRM
Measured Original Gravity: 1.050 SG
Measured Final Gravity: 1.012 SG Actual Alcohol by Vol: 5.0 % Calories: 166.1 kcal/12oz Mash Profile
Mash Name: BIAB, Medium Body
Sparge Water: 0.00 gal Sparge Temperature: 168.0 F Adjust Temp for Equipment: TRUE
Total Grain Weight: 23 lbs
Grain Temperature: 72.0 F Tun Temperature: 72.0 F Mash PH: 5.20
Sparge: If steeping, remove grains, and prepare to boil wort
Mash Notes: Brew in a bag method where the full boil volume is mashed within the boil vessel and then the grains are withdrawn at the end of the mash. No sparging. This is a medium body beer profile.
Carbonation and Storage
Carbonation Type: Keg
Pressure/Weight: 13.72 PSI Keg/Bottling Temperature: 45.0 F Fermentation: Ale, Single Stage
Volumes of CO2: 2.4
Carbonation Used: Keg with 13.72 PSI Age for: 30.00 days Storage Temperature: 65.0 F Notes15 minute rest at flameout
Created with BeerSmith |
|
Overall the brewing session went well. I had a bit of a scare when I failed to turn the burner off completely after hitting the mash temp and accidentally left it on low. Luckily I checked after 10 minutes... and the temp was 165F!! My first thought was to add some cold water, which I did and the temp lowered to 158F. At this point, the kettle was about as full you ever want and still have room to stir. I decided to leave it alone, kept the lid off, and stirred every 5 or 10 minutes throughout the mash. I also knew I had enough DME (dry malt extract) on hand to make up the difference if my pre-boil gravity was too low.
The refractometer came in very handy today because, unlike a hydrometer, it doesn't require a certain temperature to check the gravity. I took a few readings during the 60-minute mash and at the end, the pre-boil conversion was 11.2 brix which is about 1.045 which was close enough for me. I wasn't sure exactly what the original gravity would be but decided not to add any DME. Once the wort cooled to less than 70F degrees, I dropped a hydrometer in and it read exactly 1.050!
Let's see, what else. I posted my BIAB process a few years ago and still do everything basically the same except now I brew in the garage. This has a few key benefits which you can see in the pictures below. First, I can brew while it's raining. This might not seem like a big deal but trust me, I've brewed in the rain before and it sucks. The next thing that made life easier being inside is I have a pulley to hoist the bag! Now brewing that barleywine won't be such a huge hassle. Finally, my buddy scoundrel suggested I tap off the hot water line from the washing machine since its close to the garage. This was brilliant because we are always trying to find ways to save time and starting with 135F degree water for the mash and when adding hot water to achieve the correct pre-poil volume shaved off some serious time!
Also, during the mash I mounted a timer to the wall behind the kettle!
Cheers,
TKnice
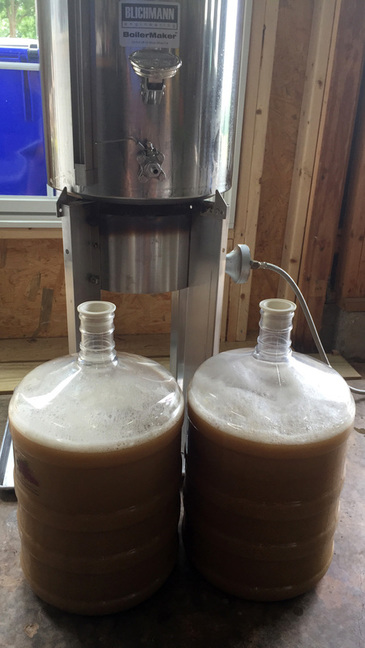
I checked the carboys this morning and everything looks good. I hoped to get the temps a bit lower but probably need to remove some water from the bucket in the freezer that feeds the ferm chambers-- there's too much in there for this little college sized unit to handle. 66F degrees should be good enough though.
