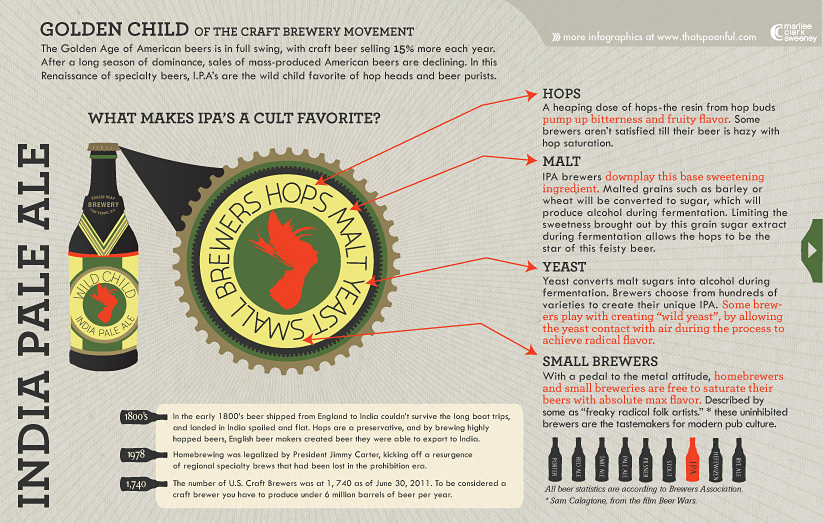
Thanks to Tony Bellatto for sharing his ideas and infographic on one of the most popular craft beer styles--the IPA.
|
Thanks to Tony Bellatto for sharing his ideas and infographic on one of the most popular craft beer styles--the IPA.
0 Comments
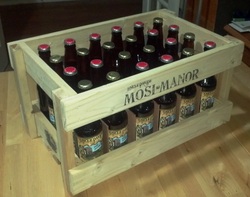 This crate will hold a case of 12oz beer bottles with dividers to protect your homebrew. The design is based on the original Two Picket Beer Crate, so if you are having problems putting this one together, read the detailed instuctions for the Two Picket Beer Crate for help.
This crate is made from 1x2 and 1x3 furring strips and is held together with 2 1/2 finishing nails and wood glue. The antique finish is done with a steel wool and vinegar mixture. You can find how to do the finish and how to emboss your own logo in those instructions as well. Don't forget to download the template which you can use to trace and create hardboard dividers for the crate. [Read More] 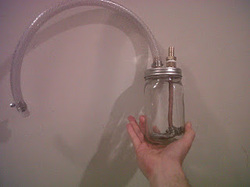 Orion from the popular homebrewing site of the same name has come up with a simple and inexpensive solution for the hop back. Here is some of what he had to say about it, along with a link to his original article.
"A hopback is a device that is airtight in which hops are soaked with very hot wort from a brew kettle post boil. This extracts flavor and aroma compounds and prevents them from leaving the wort since it is in a closed airtight system. At the output end of this system is a cooling feature used to reduce the temperature and thereby lessen the escape of the volatile oils from the hops and keep them in the wort. After much research as to how to create a hopback, I have decided to go with the quart mason jar option instead of using a stainless steel canister from a large store such as "Bed Bath and Beyond". The reason behind this is simple, I have little money to spend on brewing stuff, so a mason jar which was $1.99 beat out a $21.99 set of four stainless steel canisters. I also like the fact that you can look inside it as the hops steep, I dunno, the 7 year old mad scientist in me likes watching his projects unfold..." [Read More] 
This explains it all. (sorry to the homebrew girls--not meant for you ; ) 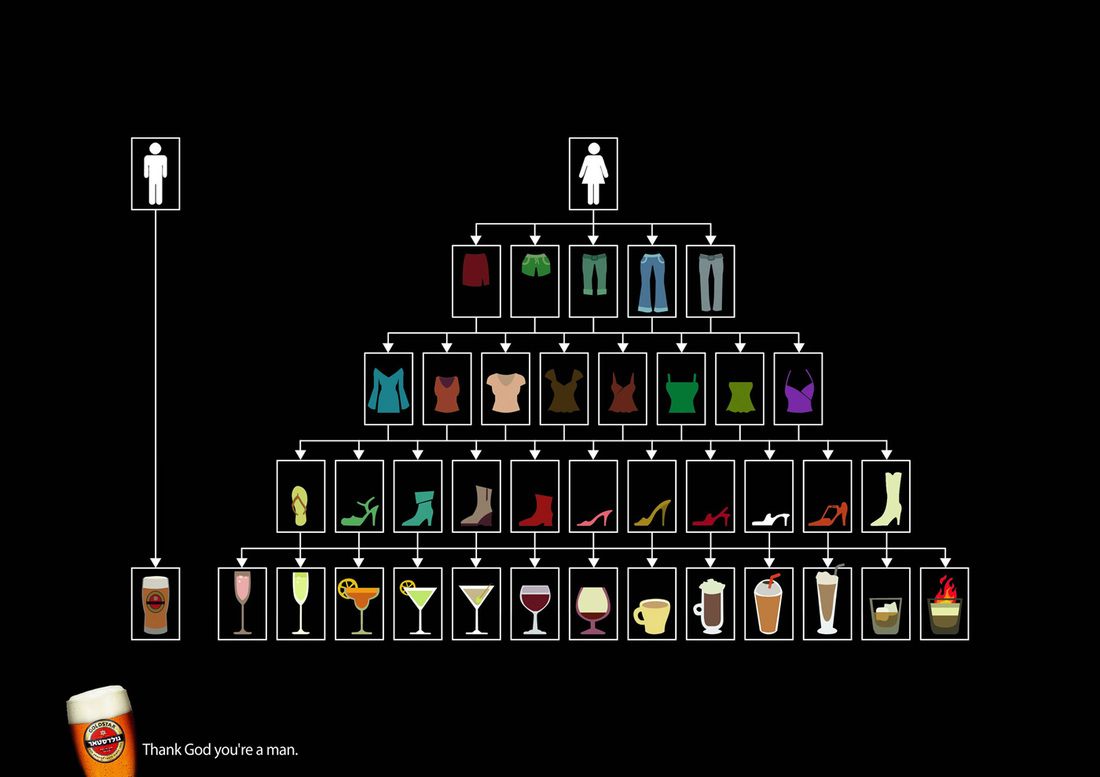 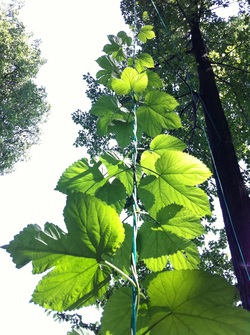 After almost a month, all three varieties seem to be doing very well. Willamette has sprouted and one of its bines grabbed the cable without any help at all!
I'll cut back the extra bine soon so that all of the plants energy is focused on the root system and not supporting unnecessary growth. Cascade has grown twice it's height since our last update and is probably around 12-15 feet tall. This plant looks very healthy and I see no signs of aphids or mites on the backs of the leaves. The oldest leaves down in the first 1-2 feet do show signs that something munched them but there are no signs of anything else. I should probably look into how to treat them organically in case I see more of this as we move later in the season. Here is a great PDF I found that shows different diseases to watch out for. Nugget is about 3-4 feet tall and only has one bine currently climbing. You can see more pictures at the bottom of our Grow Hops section. 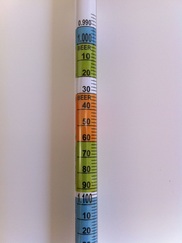 A hydrometer is an instrument used to measure the specific gravity of liquids. In the brewing process, we use it to determine how much fermentable sugar the wort contains. This is important for a few reasons. The one most people think of first is using the OG (original gravity taken before fermentation begins), and comparing it with the FG (final gravity taken after fermentation) to determine how well the yeast attenuated. This tells us the beer's alchohol content. The first calculation I learned, and probably the one I use the most today, gives a good approximation of ABV. OG - FG * 131 = ABV%.
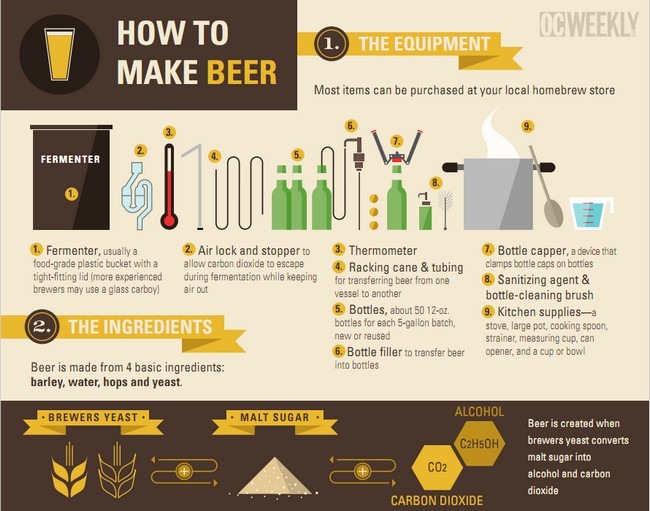
Another important reason to know where your beer "finished" is that any sugar left behind will contribute to the flavor profile and may or may not be desirable depending on the style you are brewing. The best way I've found to insure it finishes where you want is to pitch the right amount of yeast. There are a few different ways to take a hydrometer reading and they all involve floating the hydrometer in beer. This guide will focus on obtaining the FG and show you a nice trick using a beer/wine thief to do it. I should mention however that my preference is NOT to open the fermenter unless it is absolutely necessary which leaves two options that I know of. The first is to use a satellite container (usually a beer bottle) with a sample taken after the yeast was pitched. You can put a small paper towel in the top to keep bugs out and place it close to the main fermenter--just be sure to pour enough to fill your hydrometer container when it comes time to take a reading. Some people say satellites do not represent how the main beer will finish, but I have not found this to be the case. Our satellites are always within a point of the reading taken from the carboys. My favorite way to take a final gravity reading is described at the end of our Rack Beer to a Keg guide. This sample comes from the the last liter of racked beer that will be quick-carbonated for early tasting. [Read More] Thanks to OC Weekly and artist Tyler Hoehne for making this nice infographic on how to make beer. 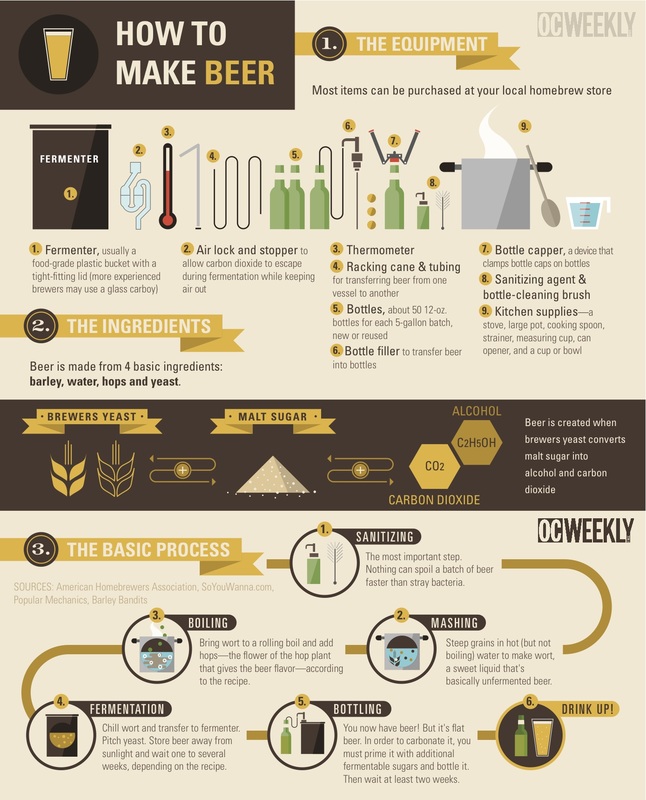
 Form of...A Clean Glass! Shape of...A Tasty Beer! You won't need twin leotards or a blue space monkey to get a great pint of beer around here.. and we aren't the only one with a passion for blogging about homebrew either. Check out these other great sites filled with personal brewing experiences and great stories! You can see the full listing anytime in our favorite things section. A special shout out goes to Shegogue Brew for providing the links!  Many commercial breweries sell their spent grain to farmers who use it to feed livestock. What do you do with yours? Although I've heard a small amount of grain makes quite a few and you won't use all of it this way, one popular option is to make dog biscuits! Here's how. What You'll Need4 Cups of Spent Grain 4 Cups of Flour 1-2 Cups of Peanut Butter 1-2 Eggs Directions
|
|||
